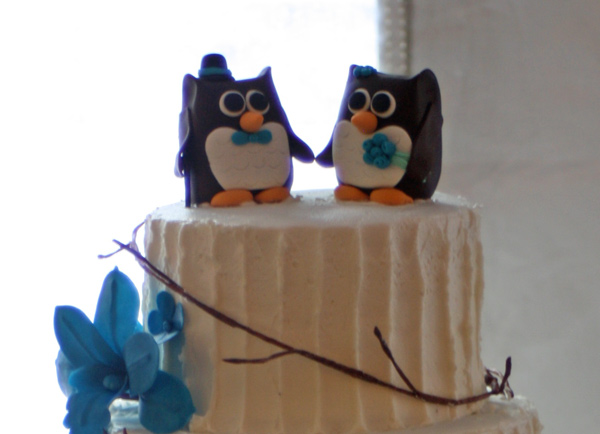
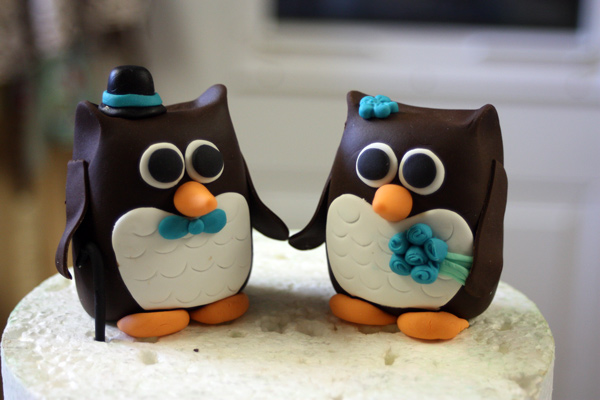
 I’ve made these adorable Owl Bride and Groom cake toppers for a number of weddings now so I thought I would share how I make them. If the steps below still seem to daunting to do on your own you can just head over to my Etsy shop and custom order a set today!
What you will need:
- Kitchen scale
- Fondant: brown, white, orange-yellow, black light green and an accent color (here I used Turquoise)
- Medium size heart cutter
- Small rolling pin (I used the Wilton fondant roller that comes with two guides)
- #12 pastry tip
- #2A pastry tip
- A long petal cutter
- Shortening (for working with fondant)
- A small knife
- Floral wire, around 22 gauge (optional)
- Fondant extruder (optional)
- Tylose or Gum Tragacanth (optional)
Step 1: The Owl Body
- Weigh out 3 ounces of dark brown/chocolate fondant for each of the owl bodies. Mix in ¼ to ½ teaspoon of tylose or gum tragacanth to each to give the body more strength.
Figure 1: Weighing out fondant
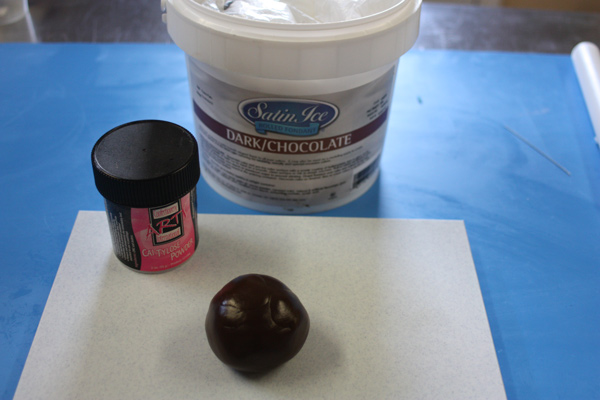
Figure 2: Shaping the body
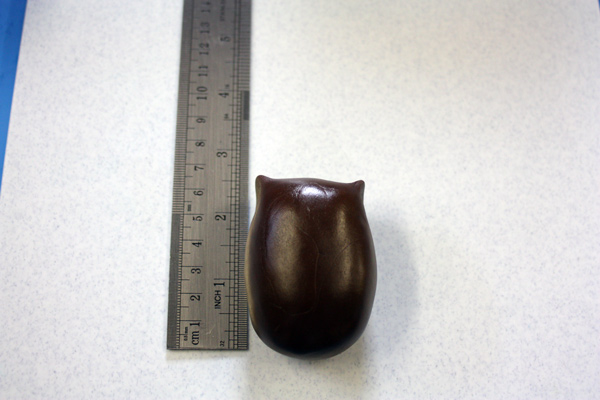
- Shape each body into a wide cylinder and flatten slightly. Pinch two ears at the top left and right of the head as shown below. The body should be about 2.5 inches tall (figure 2).
Step 2: Adding the “feathers”
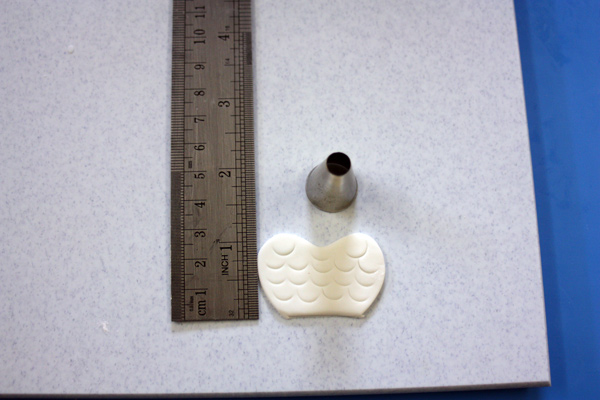
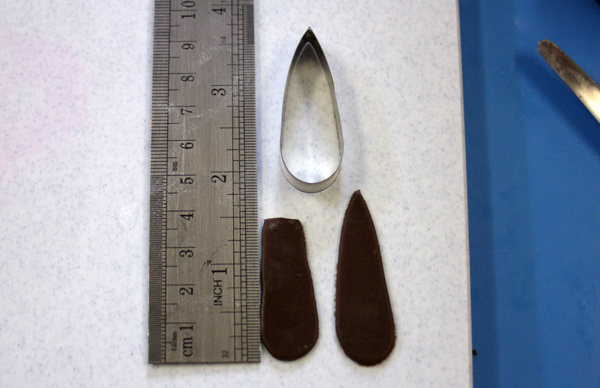
- Roll out a piece of white fondant about 1/8 inch thick (using the purple guides on the small Wilton rolling pin) and cut out two medium sized heart cutter (I used the Wilton heart cutter set). Roll the hearts length-wise once or twice to elongate and then trim the bottom off as shown in figure 3. The remaining heart should be about 1 inch tall. Using the narrow end of a tip #12 make half circle indents into the heart as shown in figure 4 to add the texture for the owl feathers.
Figure 3: Cut out heart shape to make “feathers”
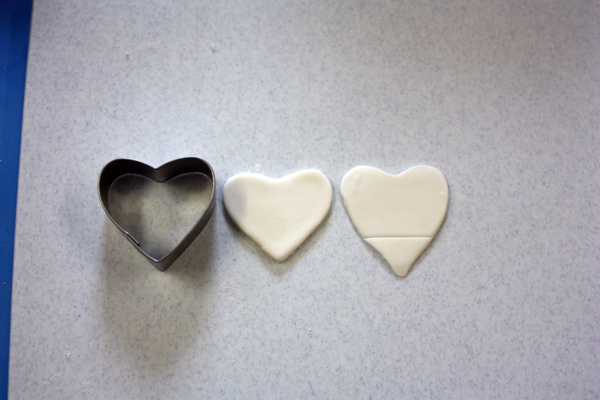
Figure 4: Use Tip #12 to imprint “feathers”
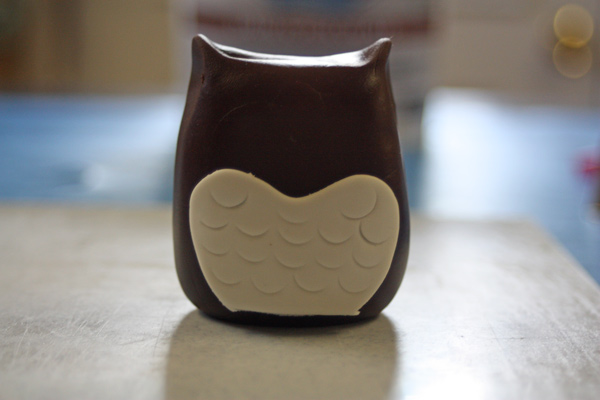
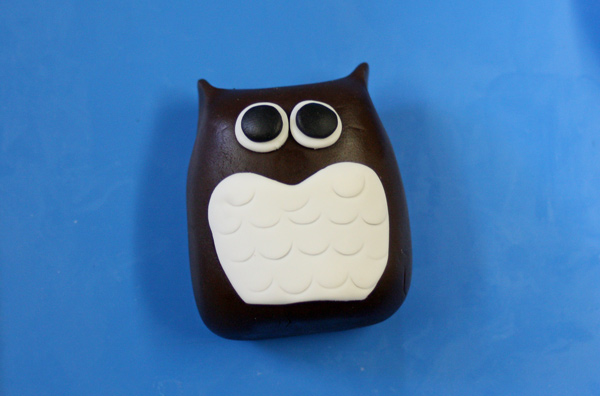
- Stand the owl up to flatten the bottom where the feet will eventually go. Brush some water onto the back of the heart and attach it to the body of the owl (figure 5) so that it is almost to the bottom of the body. Lay the owl back down until it has set, otherwise the body will start to sag. Repeat for second owl.
Figure 5: Apply the “feathers” to the body
Step 3: Make the Eyes
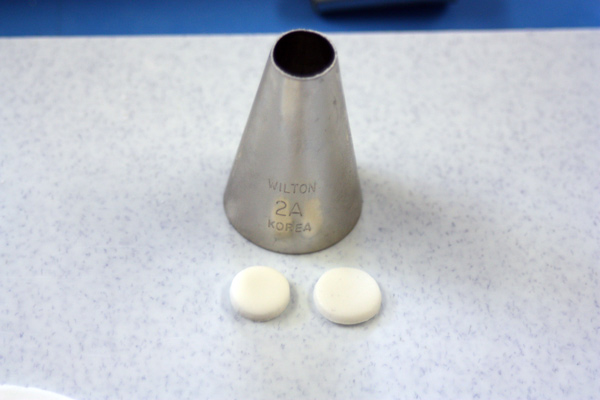
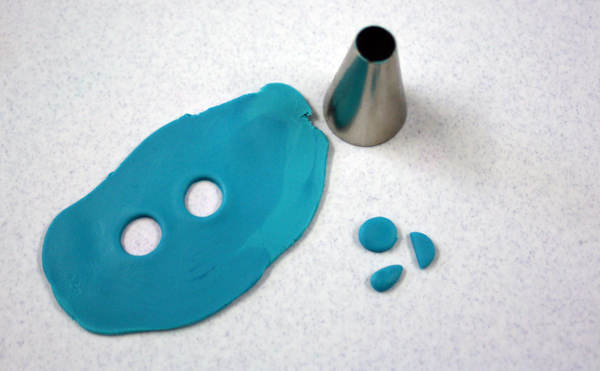
- Roll out white fondant about 1/8 inch thick (again using the purple guides) and cut out four circles using the narrow end of tip 2A, pinch the circles a bit between your figures to widen them (figure 6). (Note: If you do not have tip 2A you can roll the fondant out a little thicker and cut the circles with tip 12 and then pinch them between you figures even more to widen the circle). Set them aside.
Figure 6: Making eyes
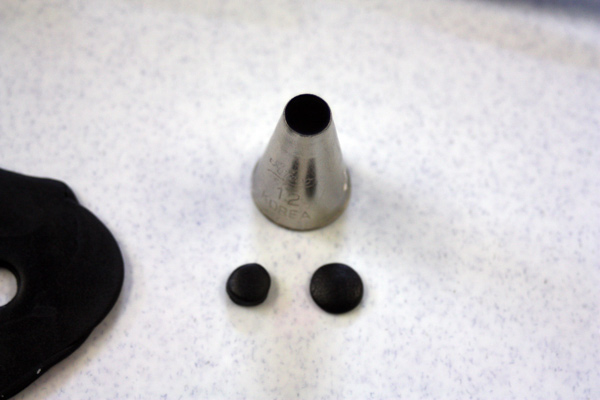
- Roll out black fondant 1/8 inch thick (purple guides) and cut out four circles using the narrow end of tip 12. Again pinch them a little between your fingers to widen (figure 7). Repeat for second owl.
Figure 7: Making pupils
- Brush a little water to the back of the white circles and position the eyes on the owls head. Brush water onto the backs of the black circles and attach to the top of the white circles (figure 8). Repeat for second owl.
Figure 8: Apply the eyes to the body
Step 4: Nose and feet
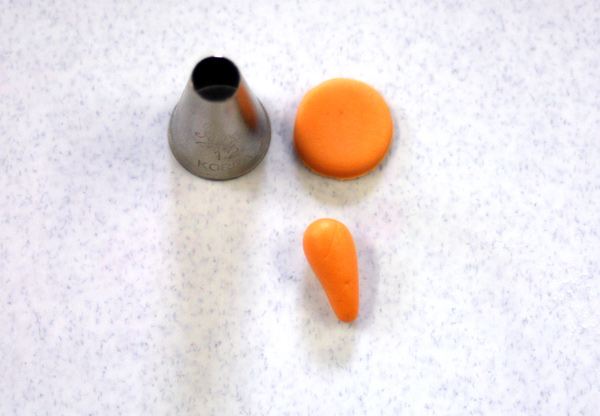
- Roll out some orange fondant 1/8 inch thick (purple guides). Cut out ten circles using the wide end of tip #12. Roll one of the circles into a ball then elongate into a cone to form the nose (figure 9). Flatten the wide and of the cone, brush with water, then attach to the owl right under the eyes (see figure 11). Repeat for second owl.
Figure 9: Form the nose
- Combine two circles and roll into a ball, then pinch one side of the ball to flatten slightly forming a foot (figure 10). Repeat with the remaining circles to create the remaining feet. Brush water on the flat part of the feet and attach to the bottom of the owls (figure 11).
Figure 10: Form the feet
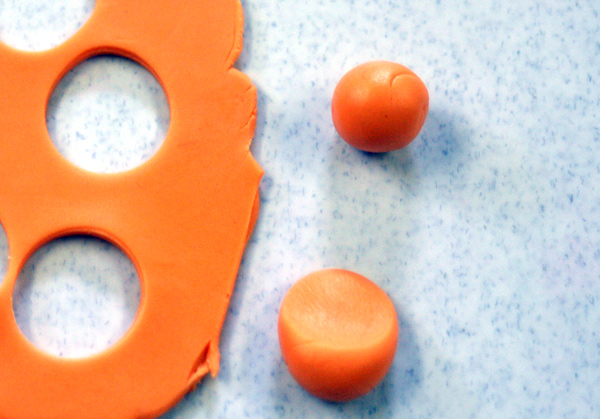
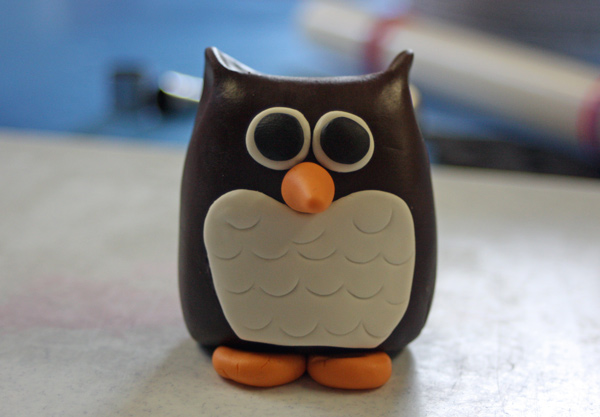
Figure 11: Apply nose and feet
Step 5: Arms & Final details
- To make the arms roll out dark brown fondant 1/16 inch thick (this time using the pink guides on the Wilton rolling pin). Using a long petal shaped cutter cut out four petals. Trim the top point off the petal (figure 12). The arm should be about 1.5 inches long. Repeat to make a total of four arms. Set the arms aside.
Figure 12: Adding the arms
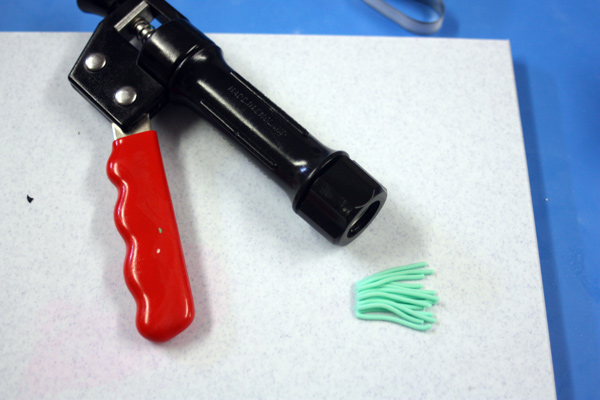
- To make the Bride’s bouquet use the multi-hole disk for the fondant extruder to make light green flower stems. Keep only five stems to match up with the 6 flowers in the bouquet. If you don’t have a fondant extruder you can roll out 6 thin ropes (figure 13).
Figure 13: Flower stems for the bride
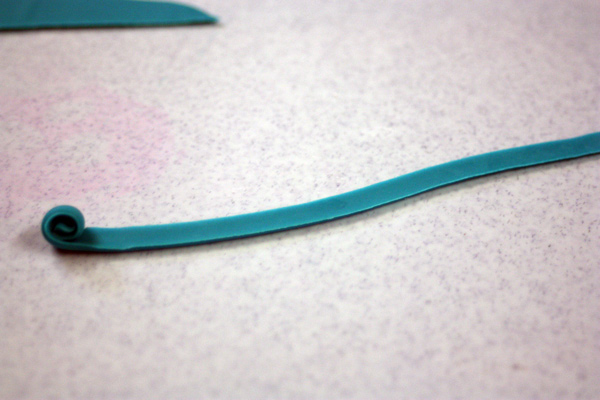
- To make the flowers roll out 6 thin flat strips of fondant in whatever color you like. You can also use the flat disk on the fondant extruder if you have one. Roll up the fondant strips to make little ribbon flowers (figure 14).
Figure 14: Flowers for the bride’s bouquet
- Attach the arms to the owls using a little water to attach at the sides of the body in line with the eyes. For the bride, put the flower stems under one of the arms using a little water to attach to the body. Using a little water to attach, place the flowers at the top of the stems forming a bouquet (figure 15). Use a small piece of rolled up parchment or wax paper to prop up the end of the other arm.
Figure 15: Add the bouquet to the bride

- For the groom use a roll of parchment/wax paper to hold up the arm that will be “holding hands” with the bride. To make a cane wrap a floral wire in black fondant then using pliers bed the end into a hook. You can use the cane to prop up the groom’s other arm or use parchment paper in its place (figure 16).
Figure 16: Adding the cane and bow-tie to the groom
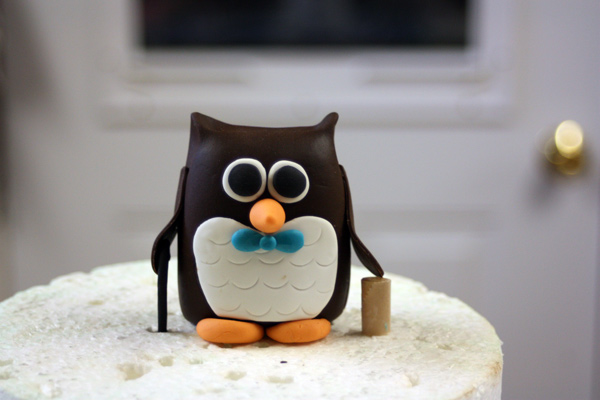
- To make the groom’s bow-tie roll out fondant in the color of your choice to 1/8 inch thick. Cut out a circle using the small end of tip #12. Cut the circle in half and roll each half into a cone. Flatten the cone to make the sides of the bowtie (figure 17). Roll a small piece of fondant into a ball and press to flatten. Attach to the groom using a little water just under the nose (figure 16).
Figure 17: How to make the bow-tie
- To make the top hat. Roll out black fondant to about 1/8 inch thick (using the purple fondant guides). Using tip # 2A cut out a large and small circle (using each end of the tip). Combine the two circles and roll into a short cylinder. Pinch one end of the cylinder all the way around to create the brim of the hat (figure 18). You can add a thin fondant band around the hat in a color that matches the bow-tie. Attach the hat to the groom’s head using a little water (figure 20). If you have a small flower cutter or mold you can also add a flower to the bride owl’s head.
Figure 18: Making the top hat
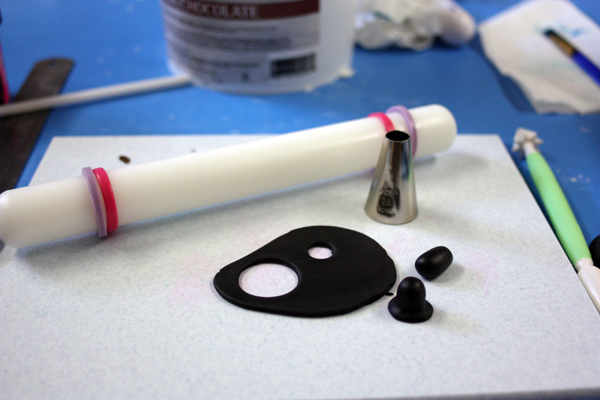
Figure 19: The happy couple
[printfriendly]


Leave a Reply
You must be logged in to post a comment.