I made this adorable baseball baby shower cake for a dear friend of mine a couple of weeks ago. They are expecting a little boy, and both her and her husband are huge baseball fans. The nursery is even going to be baseball themed, so I knew a matching cake would be perfect. Here’s a little tutorial on how I made it, you an also buy the decorations pre-made on my Etsy Shop!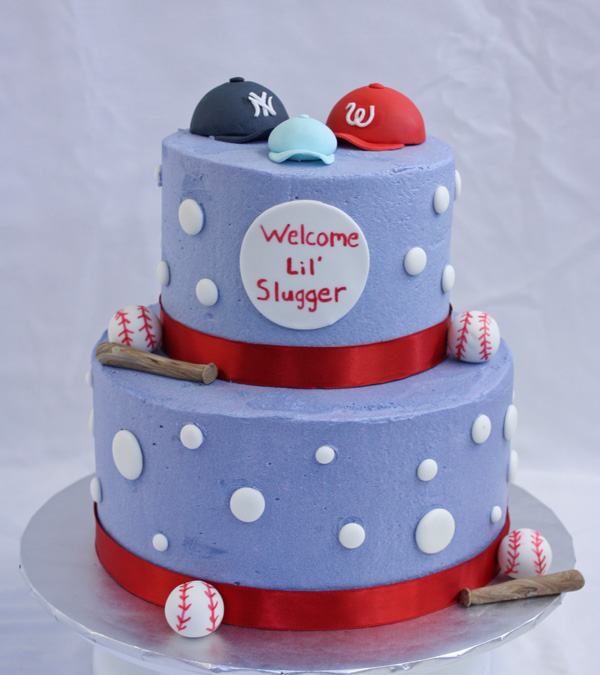 The cake itself was a two tiered buttercream cake, 9 inch round on the bottom and a 6 inch round on top. I tinted the frosting using Wilton cornflower blue
 color, which I thought was nicer than a bright royal blue. I used a 7/8 inch red satin ribbon border (see my post on how to safely apply satin ribbon). Now on to the decorations…
Dots
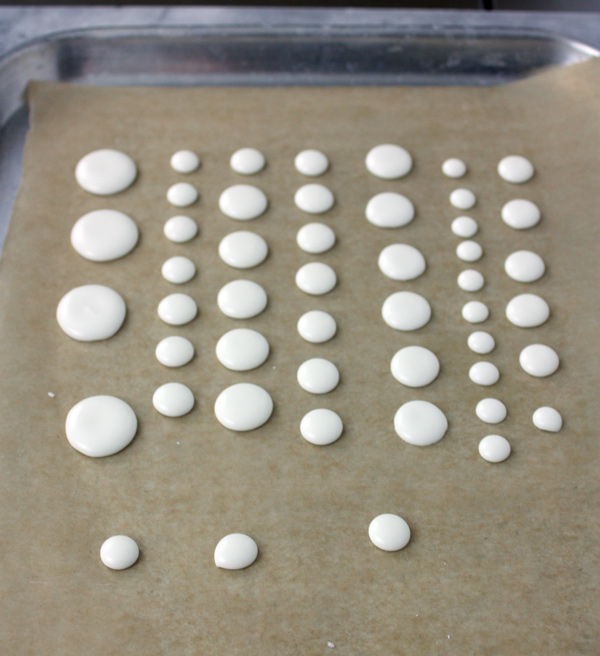
I really like the look of different sized dots adorning the sides of a cake. However, buttercream dots never come out smooth enough and putting fondant dots all over a buttercream cake doesn’t get the three dimensional look I wanted. So instead I made royal Icing dots. I thinned the royal icing to flooding consistency and used a tip #5 to make dots of various sizes. I let them dry overnight before applying to the cake.
The large dot in the middle of the top tier was made out of fondant. I rolled out white fondant and cut out a 2 inch circle using a circle cutter. I let it sit out and dry for about 30 minutes before writing the words “Welcome Lil’ Slugger” using an edible marker.
Fondant Baseball Caps
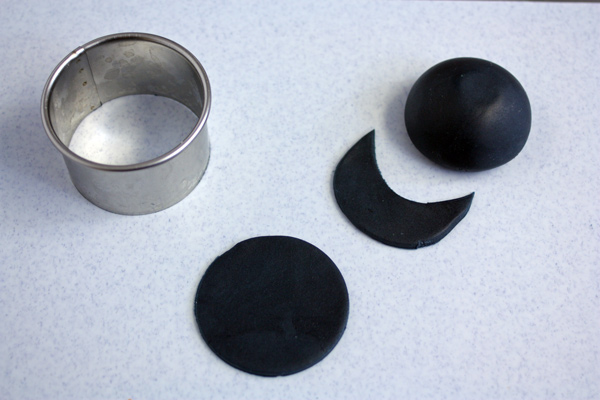
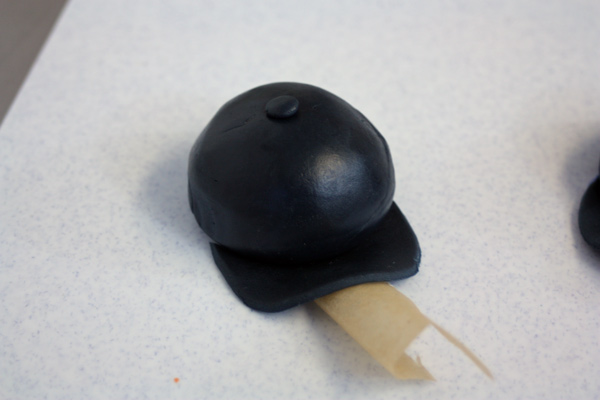
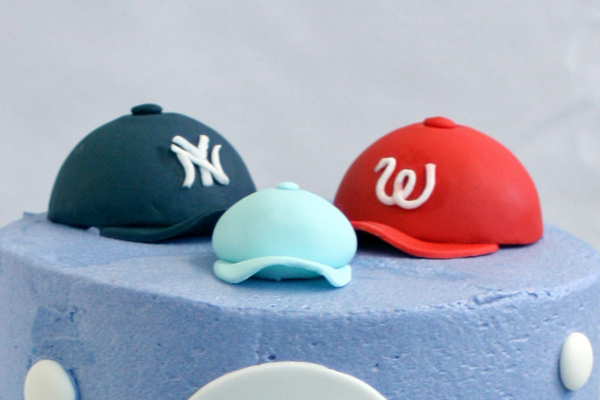 To make the baseball caps I used about 45 grams of fondant for the large hats and 20 grams of fondant for the smaller one. I also added a little tylose powder
 to the fondant to help it set faster. I rolled the fondant into a ball and then pressed it against a flat surface to flatten the bottom. For the brim of the hat I rolled out matching fondant 1/8 inch thick and used a circle cutter (the same diameter as the hat) to cut out the brim shape as shown below:
 I attached the brim to the bottom of the hat base with a dab of water then used a small piece of rolled up wax paper to prop the brim of the hat up. I rolled out a small ball of fondant and flattened it to be the button on the cap. I attached the button to the top of the hat with a little water.
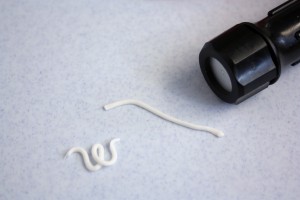
 To make the logos I used my fondant extruder with white fondant. The Washington Nations “W” was made from one continuous piece, but the NY for the Yankees required me to piece together a few smaller bits.
 Fondant Baseball Bat

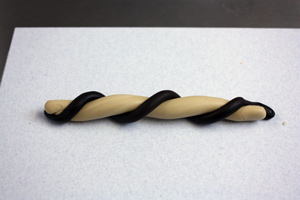
 To create a wood-grain look of a baseball bat I used a combination of light beige and dark brown fondant. You can play with the ratios of each color to get the final color to be how you want it. I started with a large rope of beige and a smaller rope of brown. Braid the two ropes together as shown below:
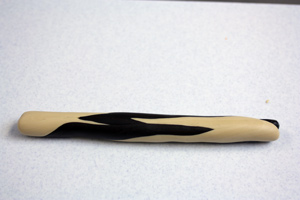
 Next roll up the braided rope onto itself…
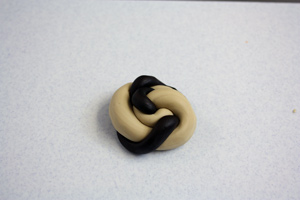 And roll out into another rope, essentially combining the two colors together.
 Now fold this new rope in half and braid it again.
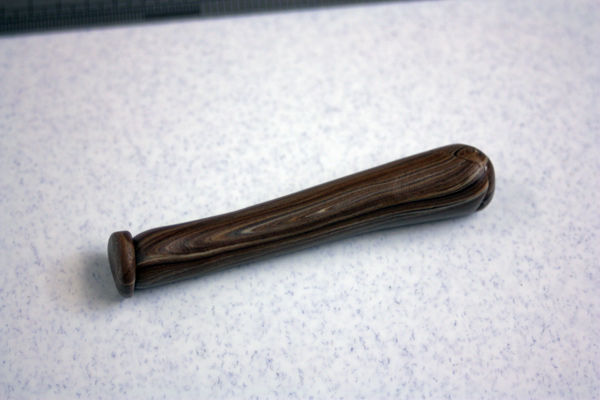
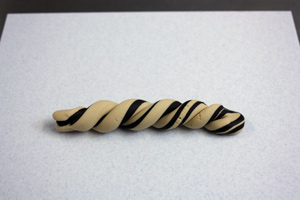 Repeat the process of rolling and braiding until you get the level of wood-grain look you want. Once it’s ready measure out 15 grams of the fondant and roll into a tapered log about 3 inches long. Roll a small ball of fondant out and flatten it to attach to the narrow end of the bat.
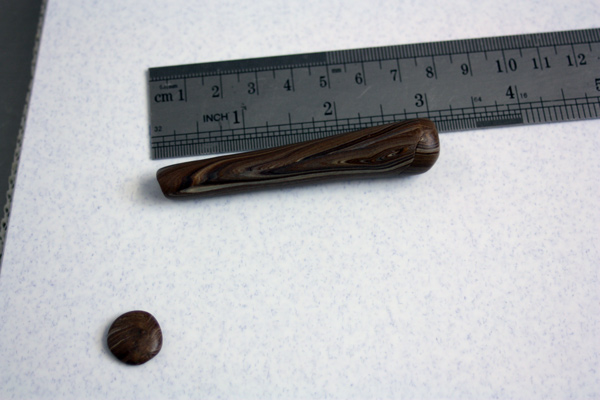
Fondant Baseballs
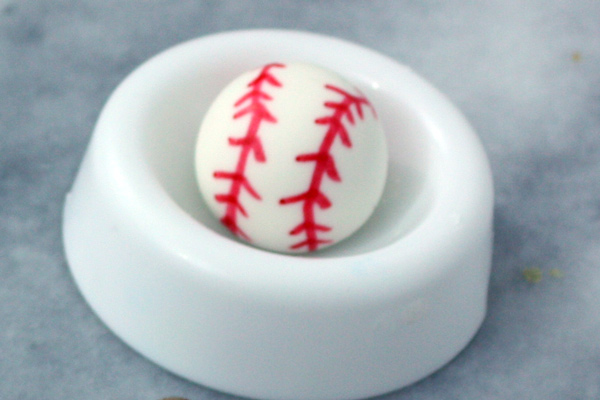 To make the fondant baseballs I rolled out 15 grams of white fondant (mixed again with a little tylose powder
 to help it firm up quicker) into a ball. I placed the balls into flower formers to help them keep their shape. Every 10 minutes or so I would re-roll the balls so that they stayed as round as possible. Once they were all dry I used a red edible marker to draw on the baseball stitching.


Leave a Reply
You must be logged in to post a comment.