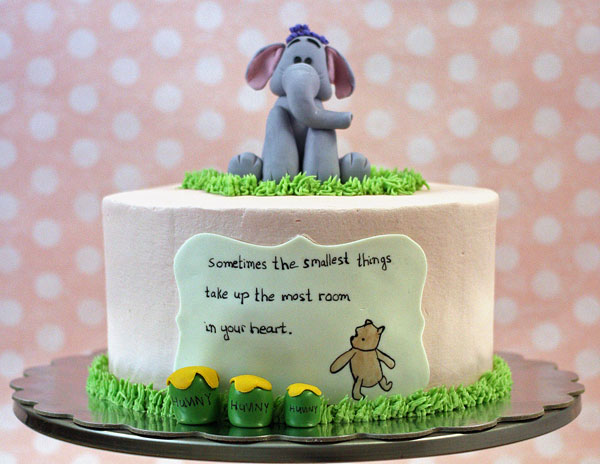
The season of baby showers is upon us (I’ve already been to one just before Christmas), so I thought it was finally time to post about made this adorable Winnie the Pooh baby shower cake I made a couple of years ago. I was so happy with how it came out, especially the Heffelump! I was a little worried about trying to recreate the iconic character, but it was a lot easier than I expected. Here are some step by step instructions on how to make this Winnie the Pooh baby shower themed cake it yourself.
What you’ll need:
- Cake frosted in color of your choice
- Tip #233 (to make “grass”)
- Green buttercream (also for “grass”)
- Fondant: white, gray, pink, purple, green, yellow and black
- long toothpick or wooden skewer
- paintbrush
- circle cutters
- small rolling pin
- small knife
- round cake dummy
- Gumpaste tools (optional)
- fondant extruder (optional)
Creating the Heffelump
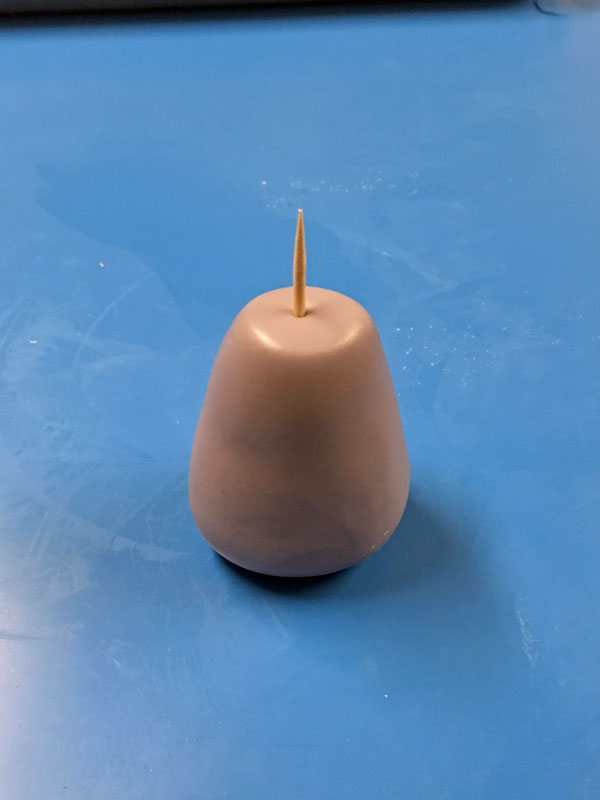
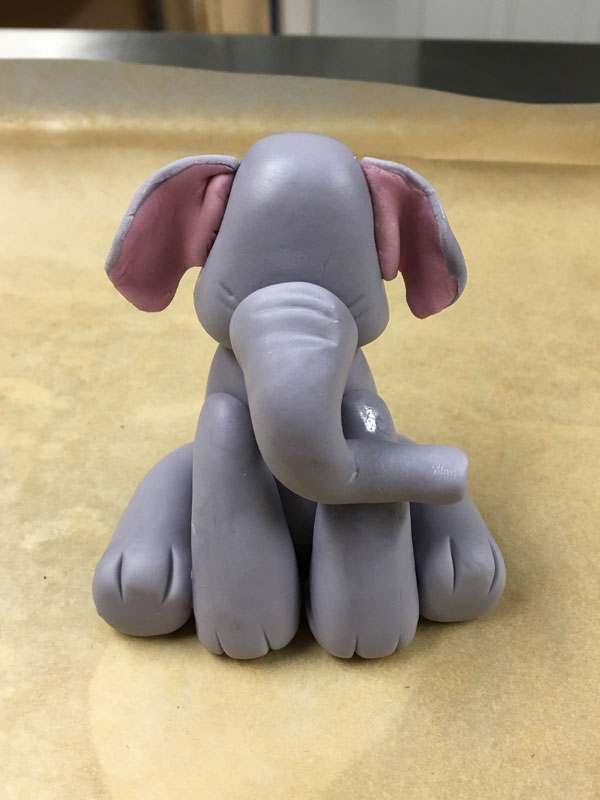
I created the Heffelump using gray fondant for the body, pink for the inner ears, purple for the hair, and a little black for the eyes. To form the body start with about 50 grams of grey fondant. Roll into a wide cylinder, then roll the top a little narrower so that it tapers. Flatten the top of the body by tapping on a flat surface. I inserted a toothpick into the body so that the head will have some support when I attach it.
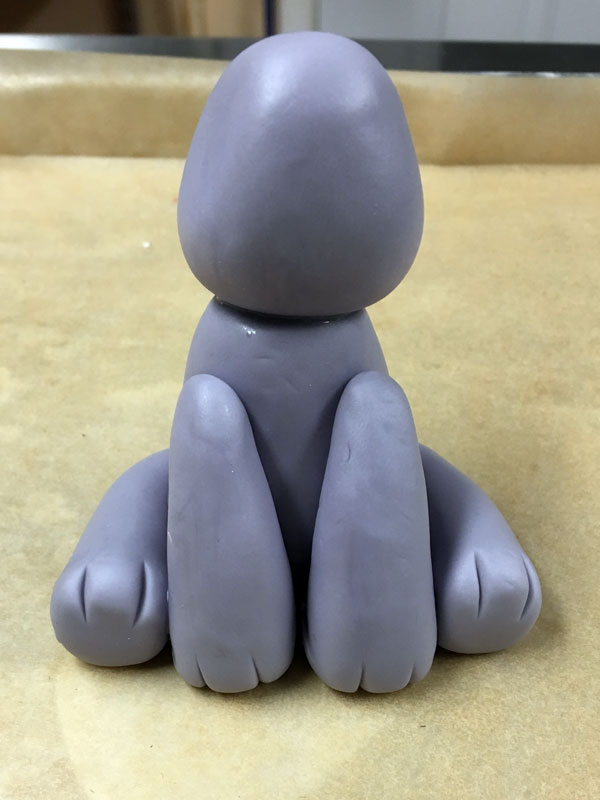
Arms and Legs
For the arms and the legs I used 10 grams of fondant for each. Similar to the body, I rolled each into a log that was tapered at the top, as shown in the picture below. I put a little curve on the legs so that they could wrap around the body.

Attach the arms and the legs to the Heffelump body using a little water so that they stick. Once the placement is just right you can use a small pair of scissors to snip the fondant creating “fingers and toes”. I built the Heffelump on a parchment lined cookie sheet so that it could be easily moved, and eventually removed once it was dry.
Making the Head and Trunk
Next I formed the head using 25 grams of grey fondant. Getting the shape of the head was tricky, but I basically started with a ball of fondant then again tapered the top. The sides needed to be flattened a little because that is where the ears go. I attached the head to the body using a little water, and the toothpick as a support.
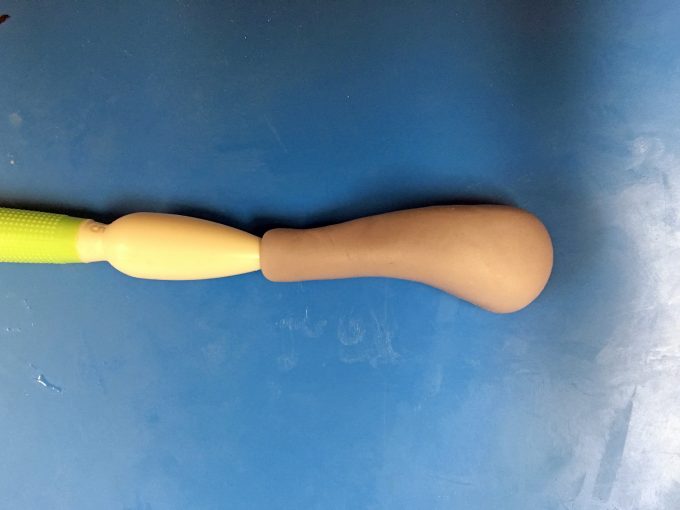
To make the trunk you need another tapered log. This time I used 9 grams of gray fondant, and for the log it should be mostly narrow with a wide top. If you have a bulbous gumpaste tool you can use it to indent the end of the trunk as shown. Attach the trunk to the head with a little water, bending it across the arms for support.
The ears were a little tricky. I rolled out some grey and pink fondant very thin and layered the pink over the gray. I then freehand cut the ears using a sharp knife. This took a few tries before I got a shape that I was happy with, and I was able to cut the left and right ear roughly the same size and shape. You can get creative here and make the ears as big or small as you like. I stretched the gray fondant over the pink a little around the top edge before pinching the ears a little and attaching to the head with water. I used one of my gumpaste veining tools to add lines to the trunk and face, but you could also use a toothpick for that.
Adding Details
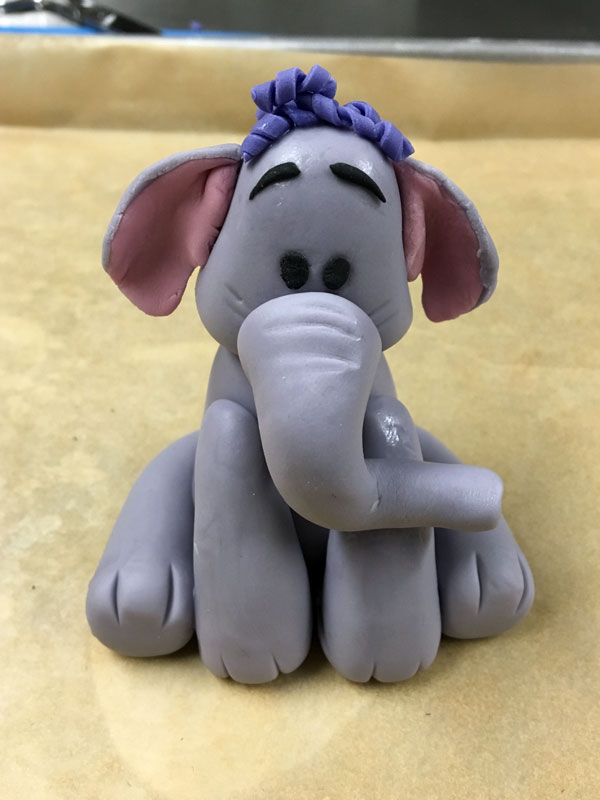
For the finishing touches it just need some hair and eyes. For the hair I used a fondant extruder to make very narrow strips of purple fondant, but if you don’t have an extruder you can just roll it thin and cut a narrow stripe with a knife. I then wrapped the fondant around a pin and let them set to make them into curls. Attach the curls to the top of the head with a little water. For the eyes use s small amount of black fondant rolled into a ball, then flattened into ovals. For the eyebrows I made small tapered cylinders of black fondant that I also flattened. Attaching the eyes and eyebrows can be tricky so sometimes using a toothpick, or very small spatula to get them in place helps.
The Plaque
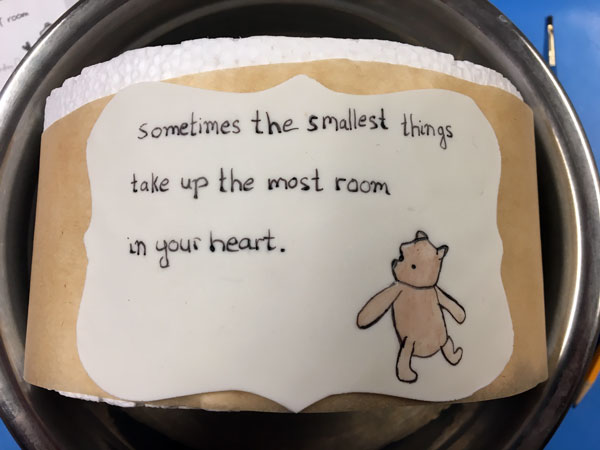
To create the plaque I used these great Wilton plaque shaped cookie cutters, but you could easily print out a plaque pattern and use it as a guide to cut the fondant. I rolled out white fondant to about 1/8 inch thickness, cut out the plaque, then set in on a parchment lined styrofoam round that was about the same size and shape as my final cake. I only did this because I was using a round cake and wanted the plaque to dry with a curve. If you make this cake as a square then you could just dry the plaque flat. I used a large mixing bowl to hold the styrofoam round steady.
Once the fondant was dry enough to write on I used an edible marker to write the saying and draw winnie the pooh. You can freehand the drawing and writing, or you can always find a pattern to print out and transfer to the fondant as a guide. I painted in the Winnie the pooh with a little powdered food coloring mixed with lemon extract.
The Hunny Pots
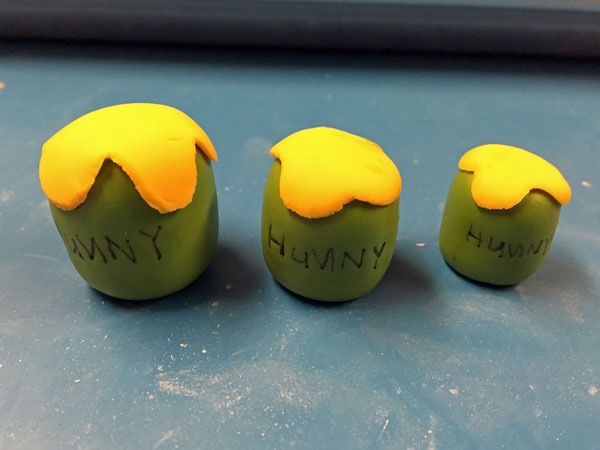
To make the honey pots (or hunny as Pooh calls it) I used a dark green fondant rolled into a very short and stout log. Then to make the “dripping honey” I used a golden yellow fondant, rolled out and cut into a very rough circle shape. I attached the “honey” with a dab of water, then used an edible marker to write the word “hunny”.
Putting it all together
I frosted a round cake with a pale pink buttercream and attached all of the decorations. I then used a tip #233 along with green buttercream to pipe a “grass” border around the cake, and around the Heffelump.


Leave a Reply
You must be logged in to post a comment.