
I happen to live somewhat far away from a lot of my family, which makes it difficult to make cakes for special occasions, especially for events I myself wasn’t able to make it to. After opening my own Etsy shop I started mailing decorations around the country and I realized I could do the same for family. My cousin’s daughter was turning 2, and she absolutely loves Minnie Mouse, so a 2-D Minnie Mouse cake topper seemed like a great idea, and since it’s flat it shipped easily. It is also very easy to make so I’ve shared my step-by-step how to below.
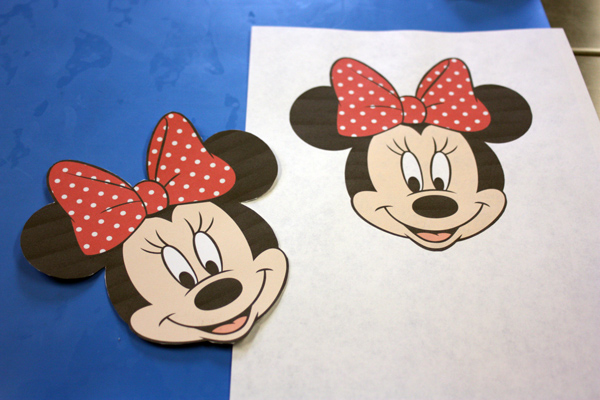
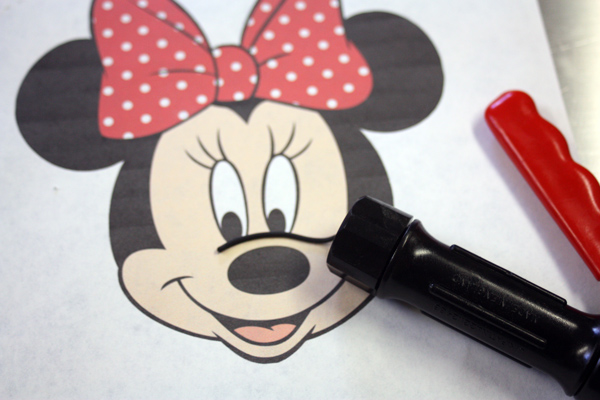
First off I needed to find a good template, so I found a great closeup of Minnie Mouse that I used. It is about 5.5in x 6in, but it can be shrunken or enlarged to fit whatever size cake you are using. I suggest printing two copies of the template, one for reference and one to cut up and use as a guide.
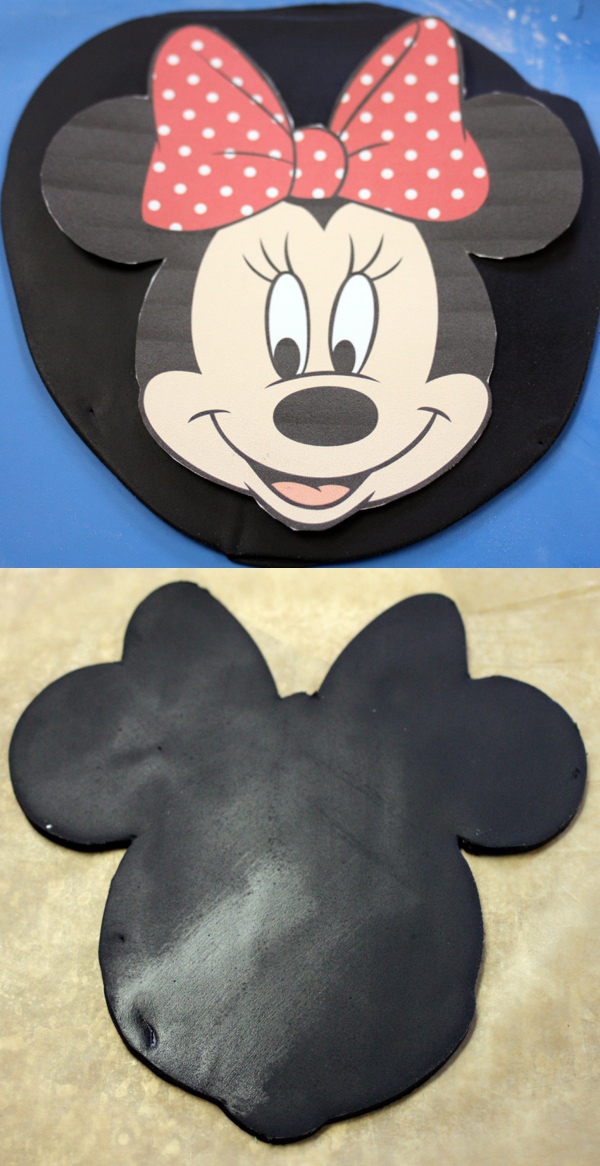
 To start the base of the Minnie mouse cake topper roll black fondant about 1/8 inch thick and lay the cut out template on top. Use a sharp knife (I like to use an exacto knife) to cut it out. Place it on a piece of parchment or wax paper.
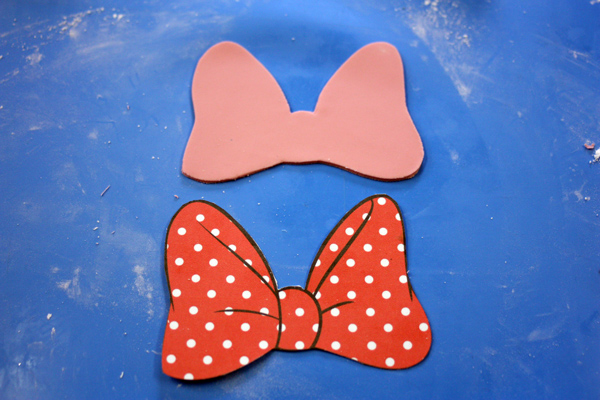
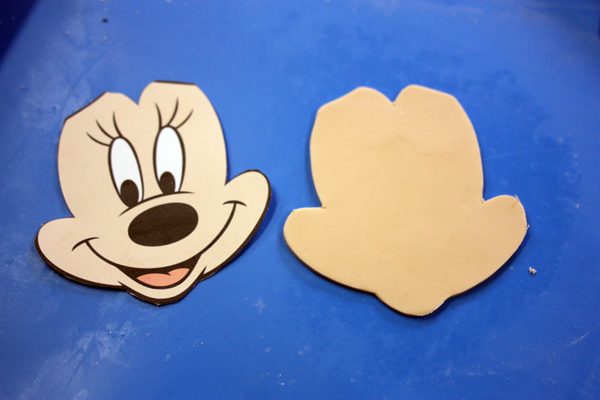
 Using the same template, cut out the bow and the face only. Roll pink fondant again to about 1/8 inch thick and use the bow template to cut out a pink bow. For the face roll out light beige fondant to 1/8 inch thick and cut out the face shape.
 Use a little water to attach the face and bow to the black base. Next using the template from the face continue cutting it down, this time cutting out the nose, eyes and mouth. Roll out a thin piece of white fondant to cut out the eyes, and roll out black fondant to cut out the nose and mouth.
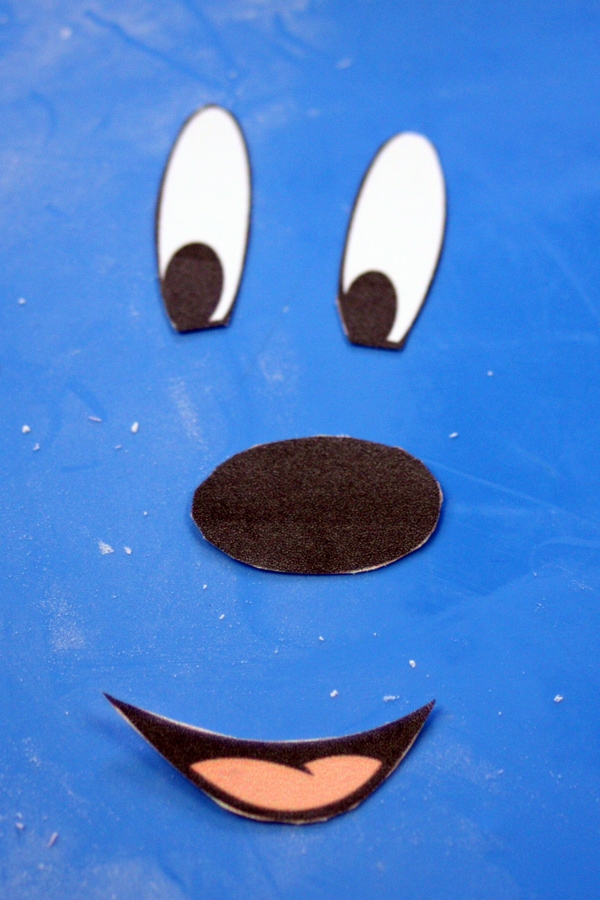 Attach the eyes, nose and mouth to the face, then cut out the pink tongue part of the mouth, roll out more pink fondant and cut out the shape of the tongue to attach it. Using the other copy of the printed template use a fondant extruder to extrude thin black ropes for the accents around the eyes, nose and mouth. Alternatively you could roll a very thin rope by hand. Attach the ropes to the face with a little water.
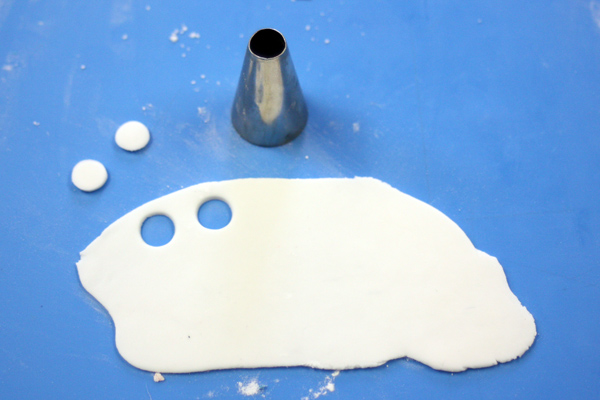
 To add the dots to the bow roll out a thin piece of white fondant and use the end of a #12 pastry tip to cut out circles. Attach to the bow with a little water. I used an edible marker to color in the circles of the eyes, but if you don’t have an edible marker you could always cut out some small, thin black fondant ovals to make them.
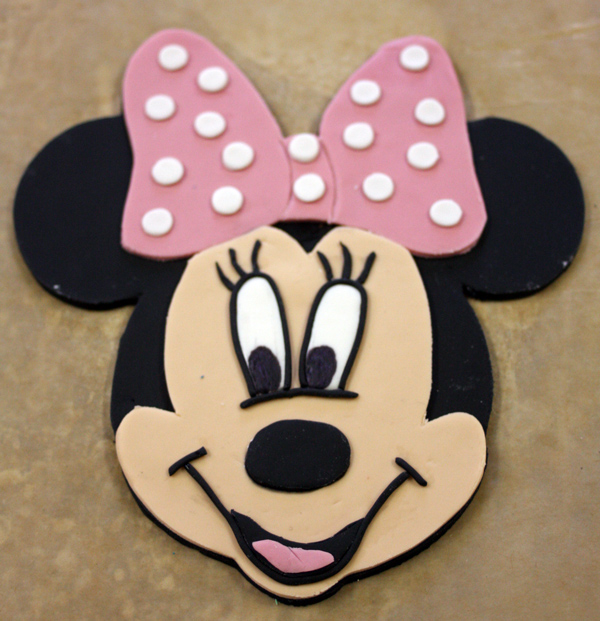
 Allow the finished Minnie Mouse cake topper to dry for a few days before carefully removing from the wax paper and placing on the cake.


Leave a Reply
You must be logged in to post a comment.