A few years ago a bride contacted me and asked if I could make a 20 sided die cake to surprise the groom at the rehearsal dinner. For those of you who don’t know, a 20-sided die is used in a classic role playing game called Dungeons & Dragons. Although I have never played the game myself, I have many friends who did and I’ve even witnessed a few games myself. Because of that the nerd in me immediately said “yes, I can make that cake”.
As the delivery date approached and I told some friends I was making a 20-sided die cake I got a lot of “how the hell are you going to do that!” so I started to get a little nervous. I realized I might have bit off more than I could chew. It was definitely the hardest cake I’ve ever made, but I was smart enough to document how I did it and I thought I would share my process with you.
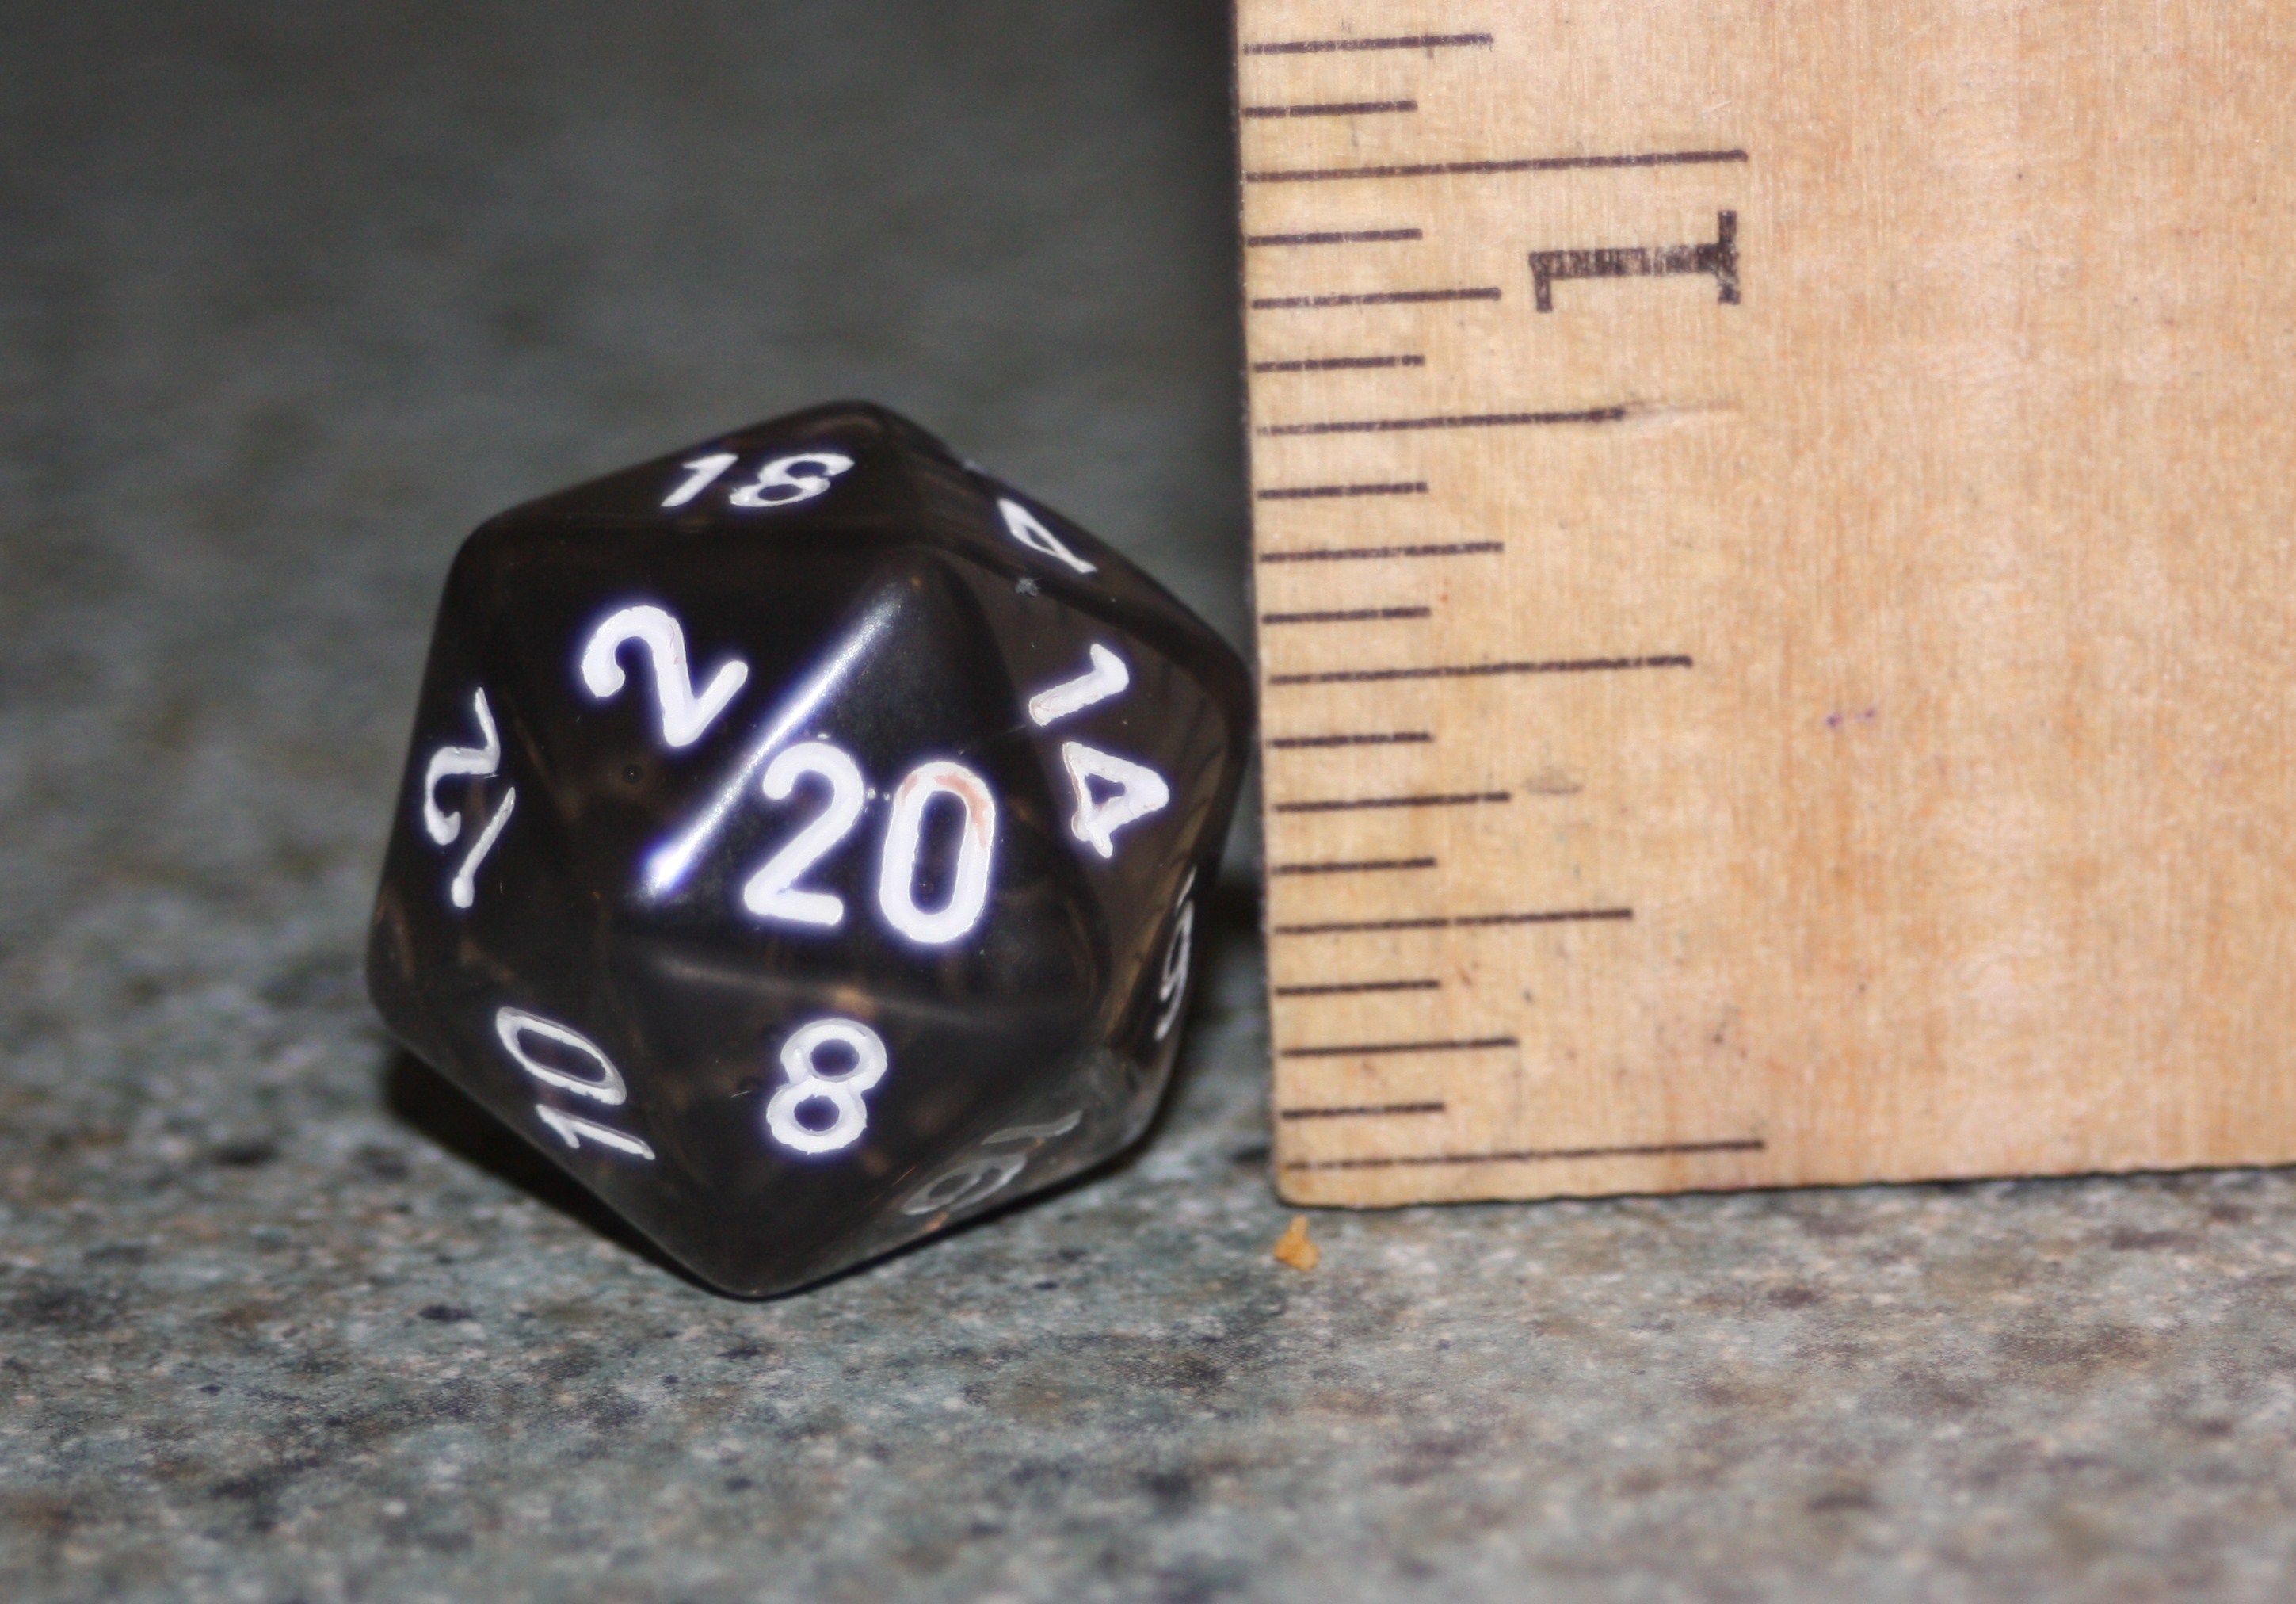
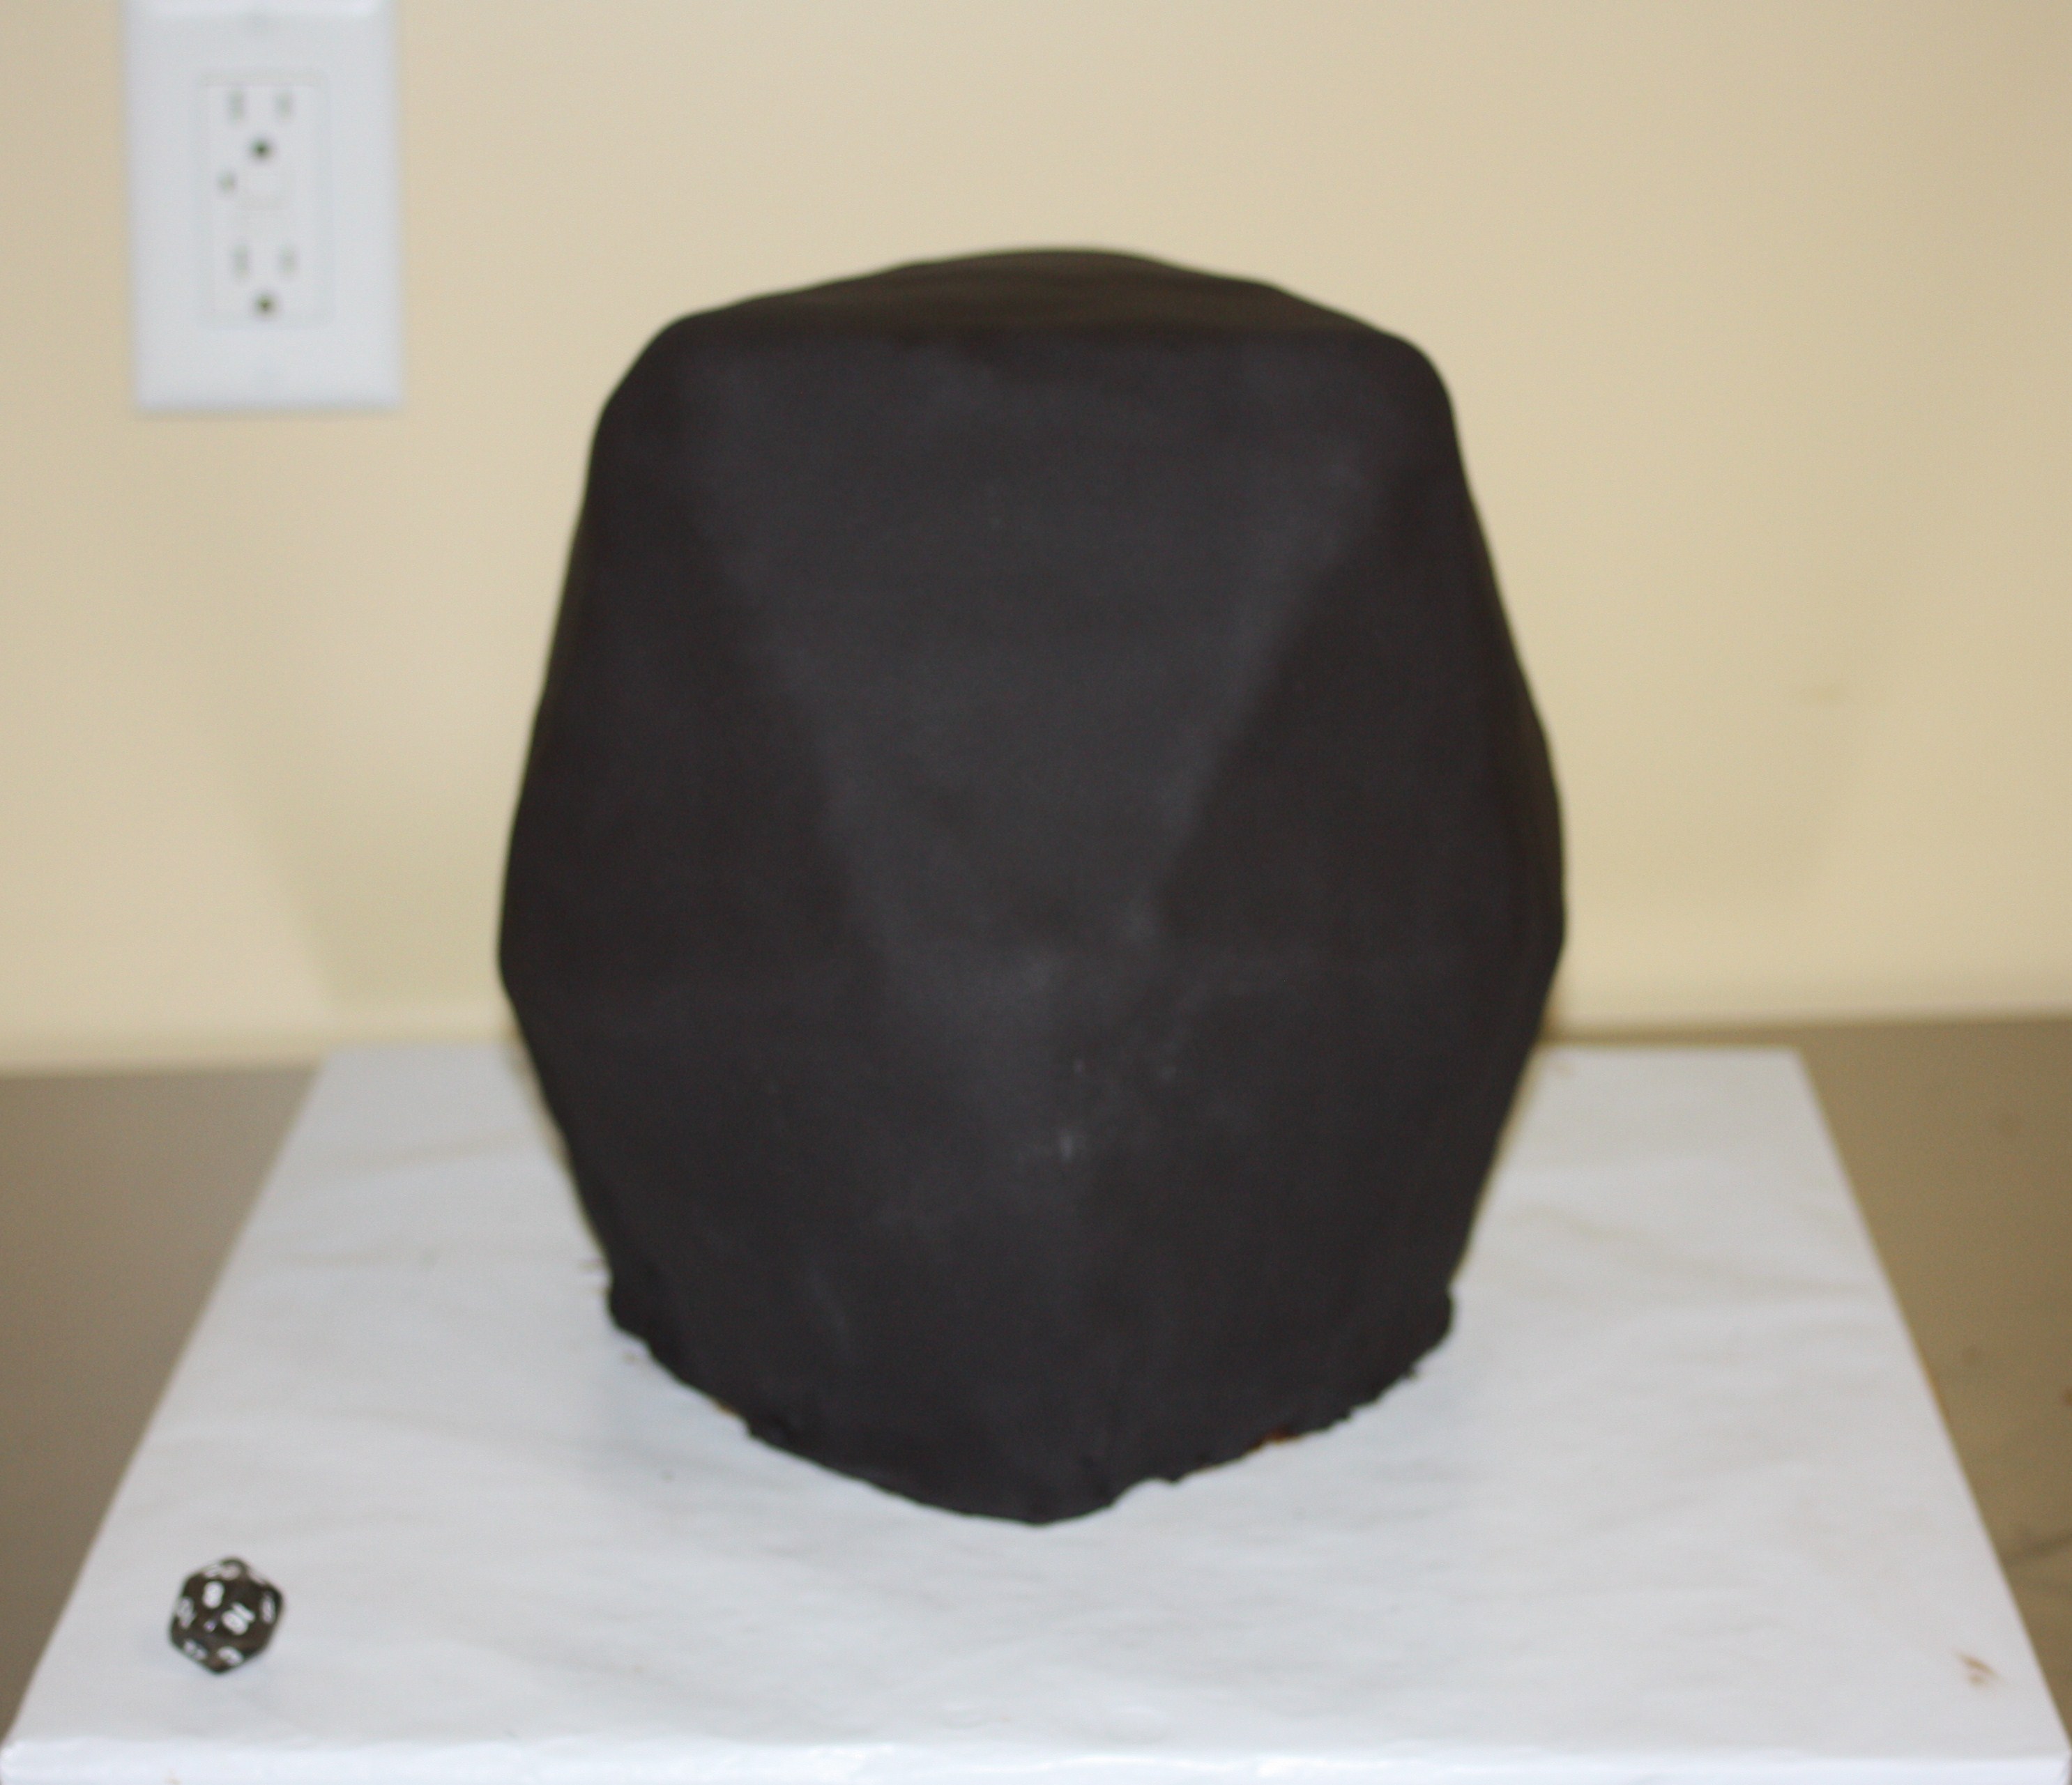
I started by first buying a 20-sided die, shown below, so that I could measure it’s proportions. I found that it is about 20 millimeters tall, 20 millimeters wide, and each face is an equilateral triangle (which means all sides are equal length) with each side measuring 12 millimeters.
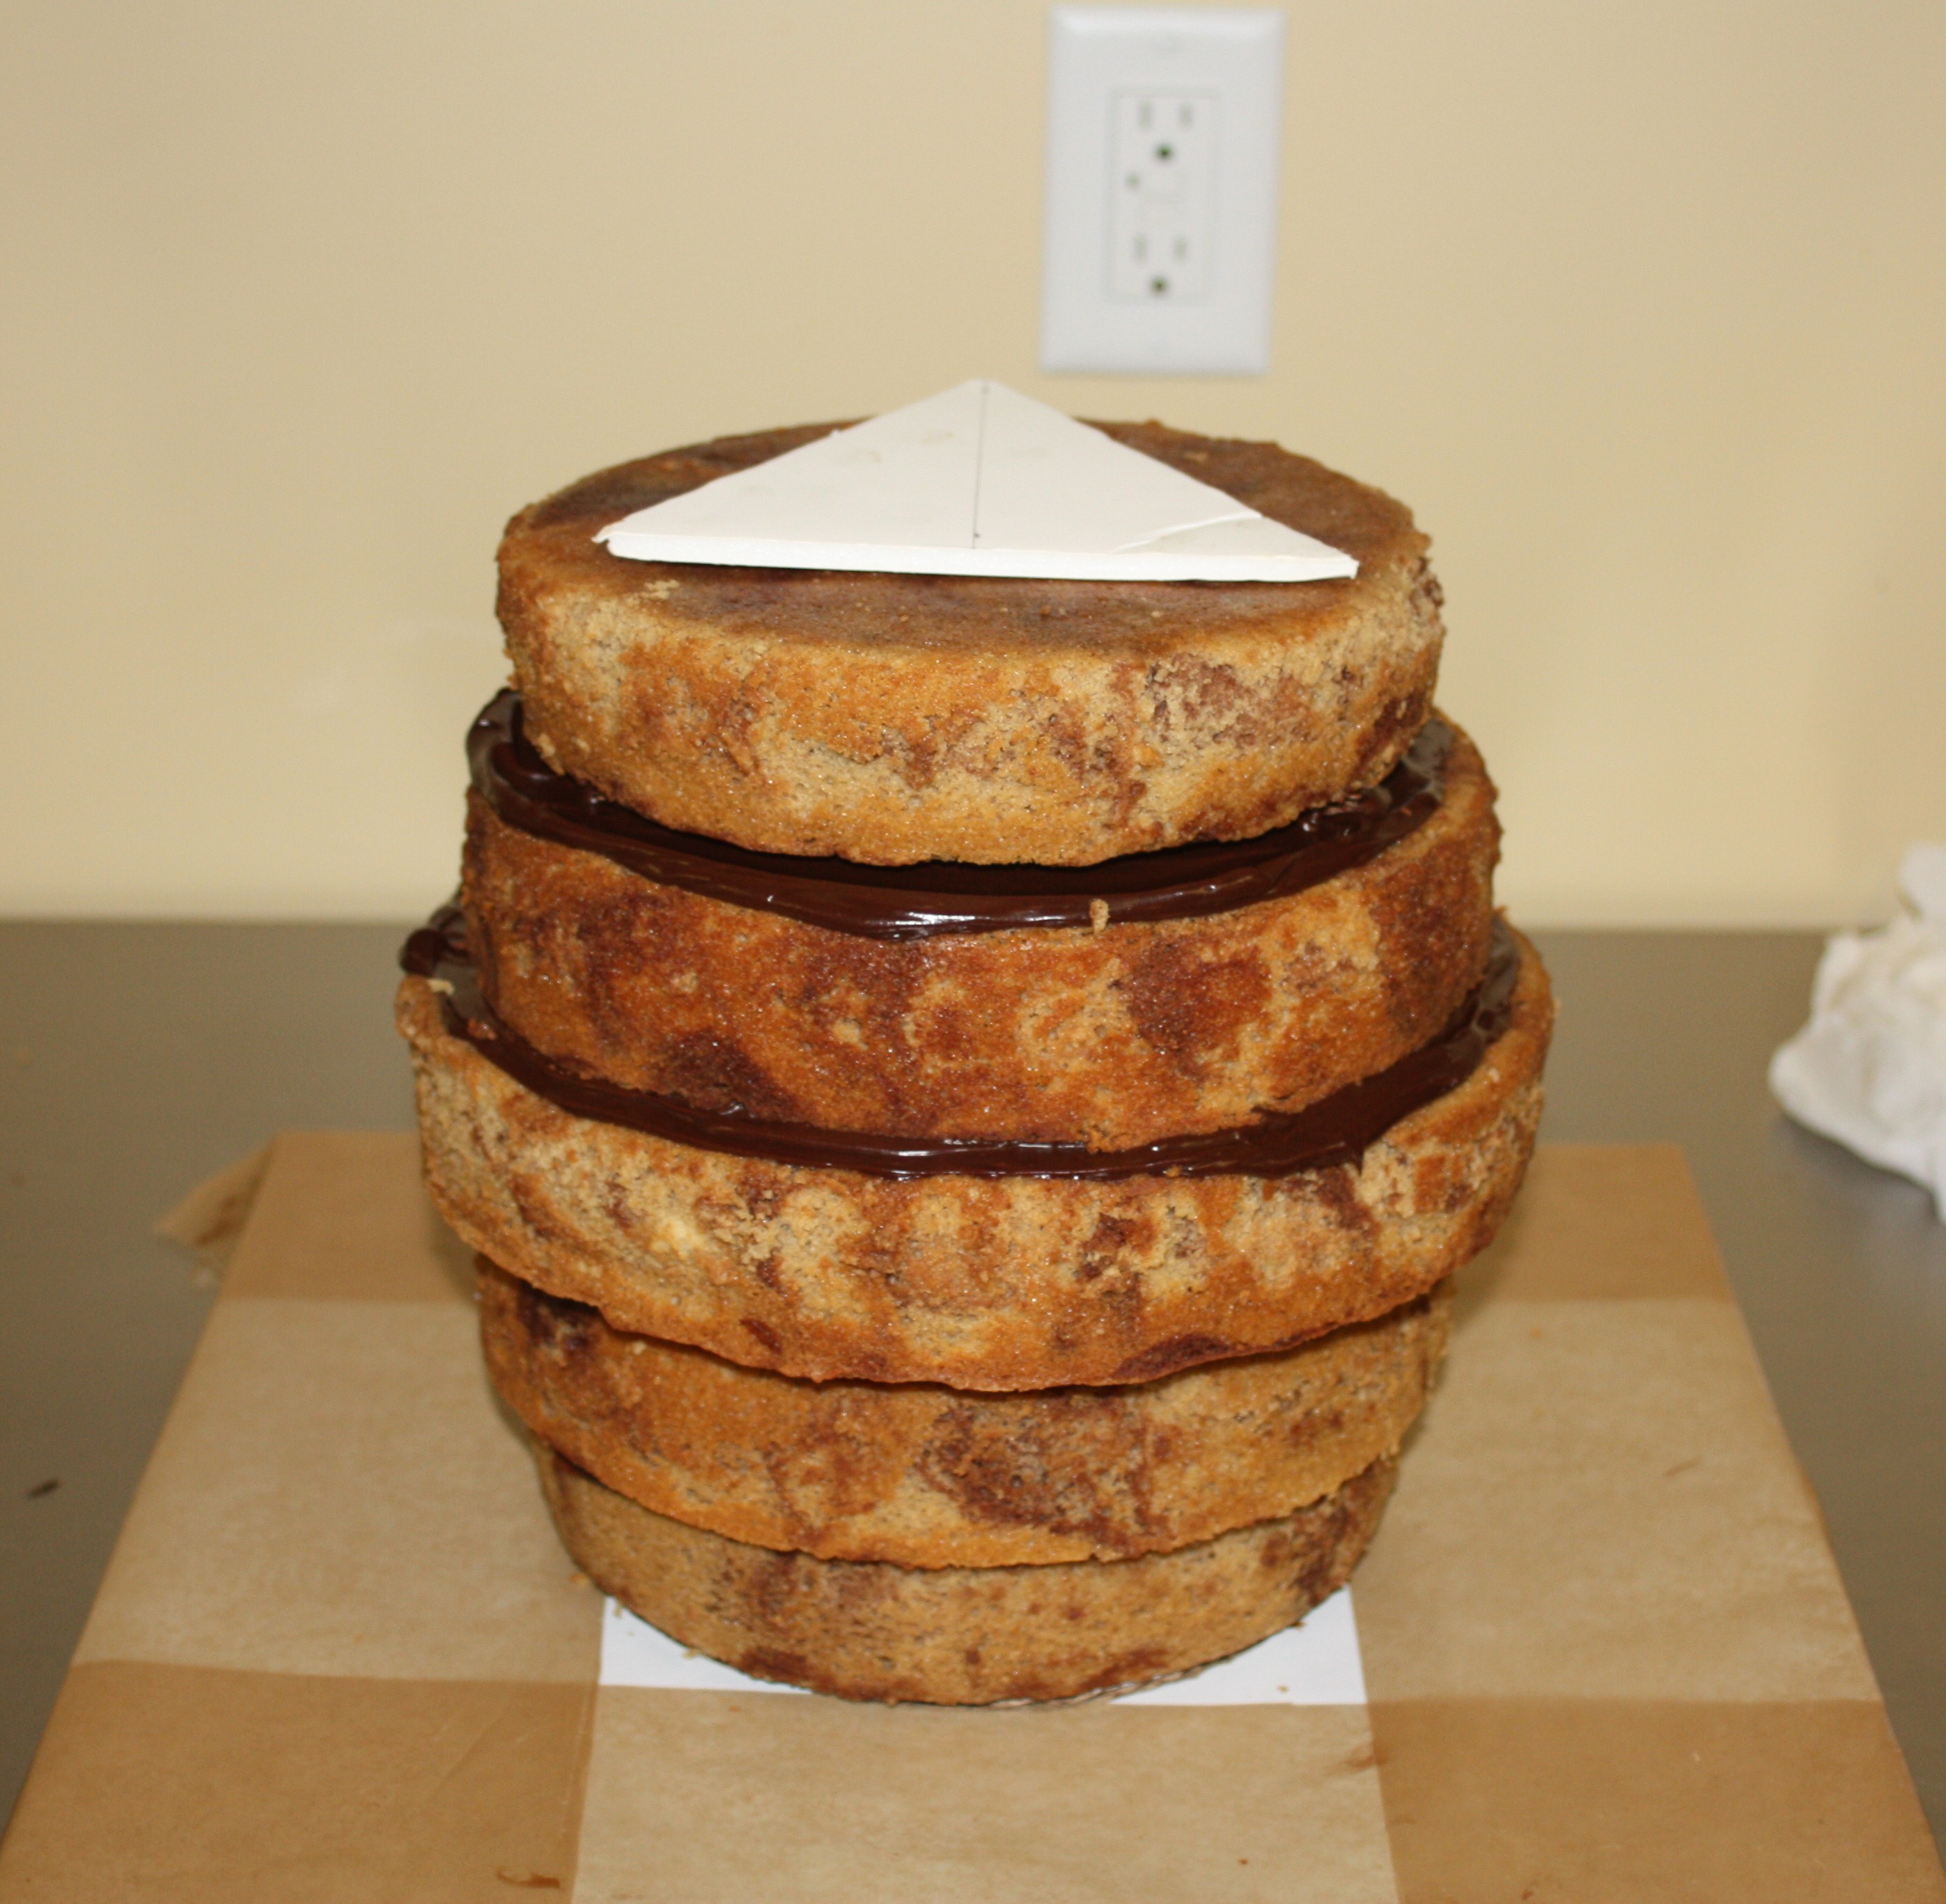
Next I had to figure out approximately how much cake I would have to use to end up being 40 servings after carving it. I decided to make five total cake layers of different sizes. Since the top and bottom were going to be carved smaller than the middle I decided to start with smaller diameter cakes on the bottom and work up to larger, then back down to small. I made two eight inch rounds, two nine inch rounds, and one ten inch round. That is about 50-60 servings so once it has been carved I figure it would be around 40 servings.
I bake my cakes to be two inches tall so five tiers would make the cake 10 inches tall overall. That makes the height and width equal, just like the 20 sided die. Based on the proportions of the 20-sided die I would need to carve the triangle faces to have 6 inch sides.
I then began to assemble the cake. I first covered the cake board with some wax paper to keep it clean. Then I stacked the 8 inch layer topped with the 9 inch layer as shown below. I decided not to tort the cakes to keep better structural integrity. I should also mention that I made sure the cakes were well chilled before assembly. Having them very cold, almost frozen even, helps make them easier to carve.

I put about 8 cookie sticks into the bottom two tiers for support. I placed an eight inch cake circle on top followed by the 10 inch layer and another nine inch layer. I put another 4 cookie sticks into this tier for support and topped it with a cake circle I cut into the shape of a triangle with 6 inch sides.

I placed the last 8 inch layer on top and then stuck a sharpened wooden dowel through the entire cake and trimmed the top off to be level with the top cake.

Then I began carving using another 6 inch sided triangle that I cut out as a guide.
Keeping track of all 20 sides was very difficult so I used toothpicks to mark the points of each side. I also started labeling each side with pieces of numbered parchment paper that I would attach to each finished side with a toothpick.
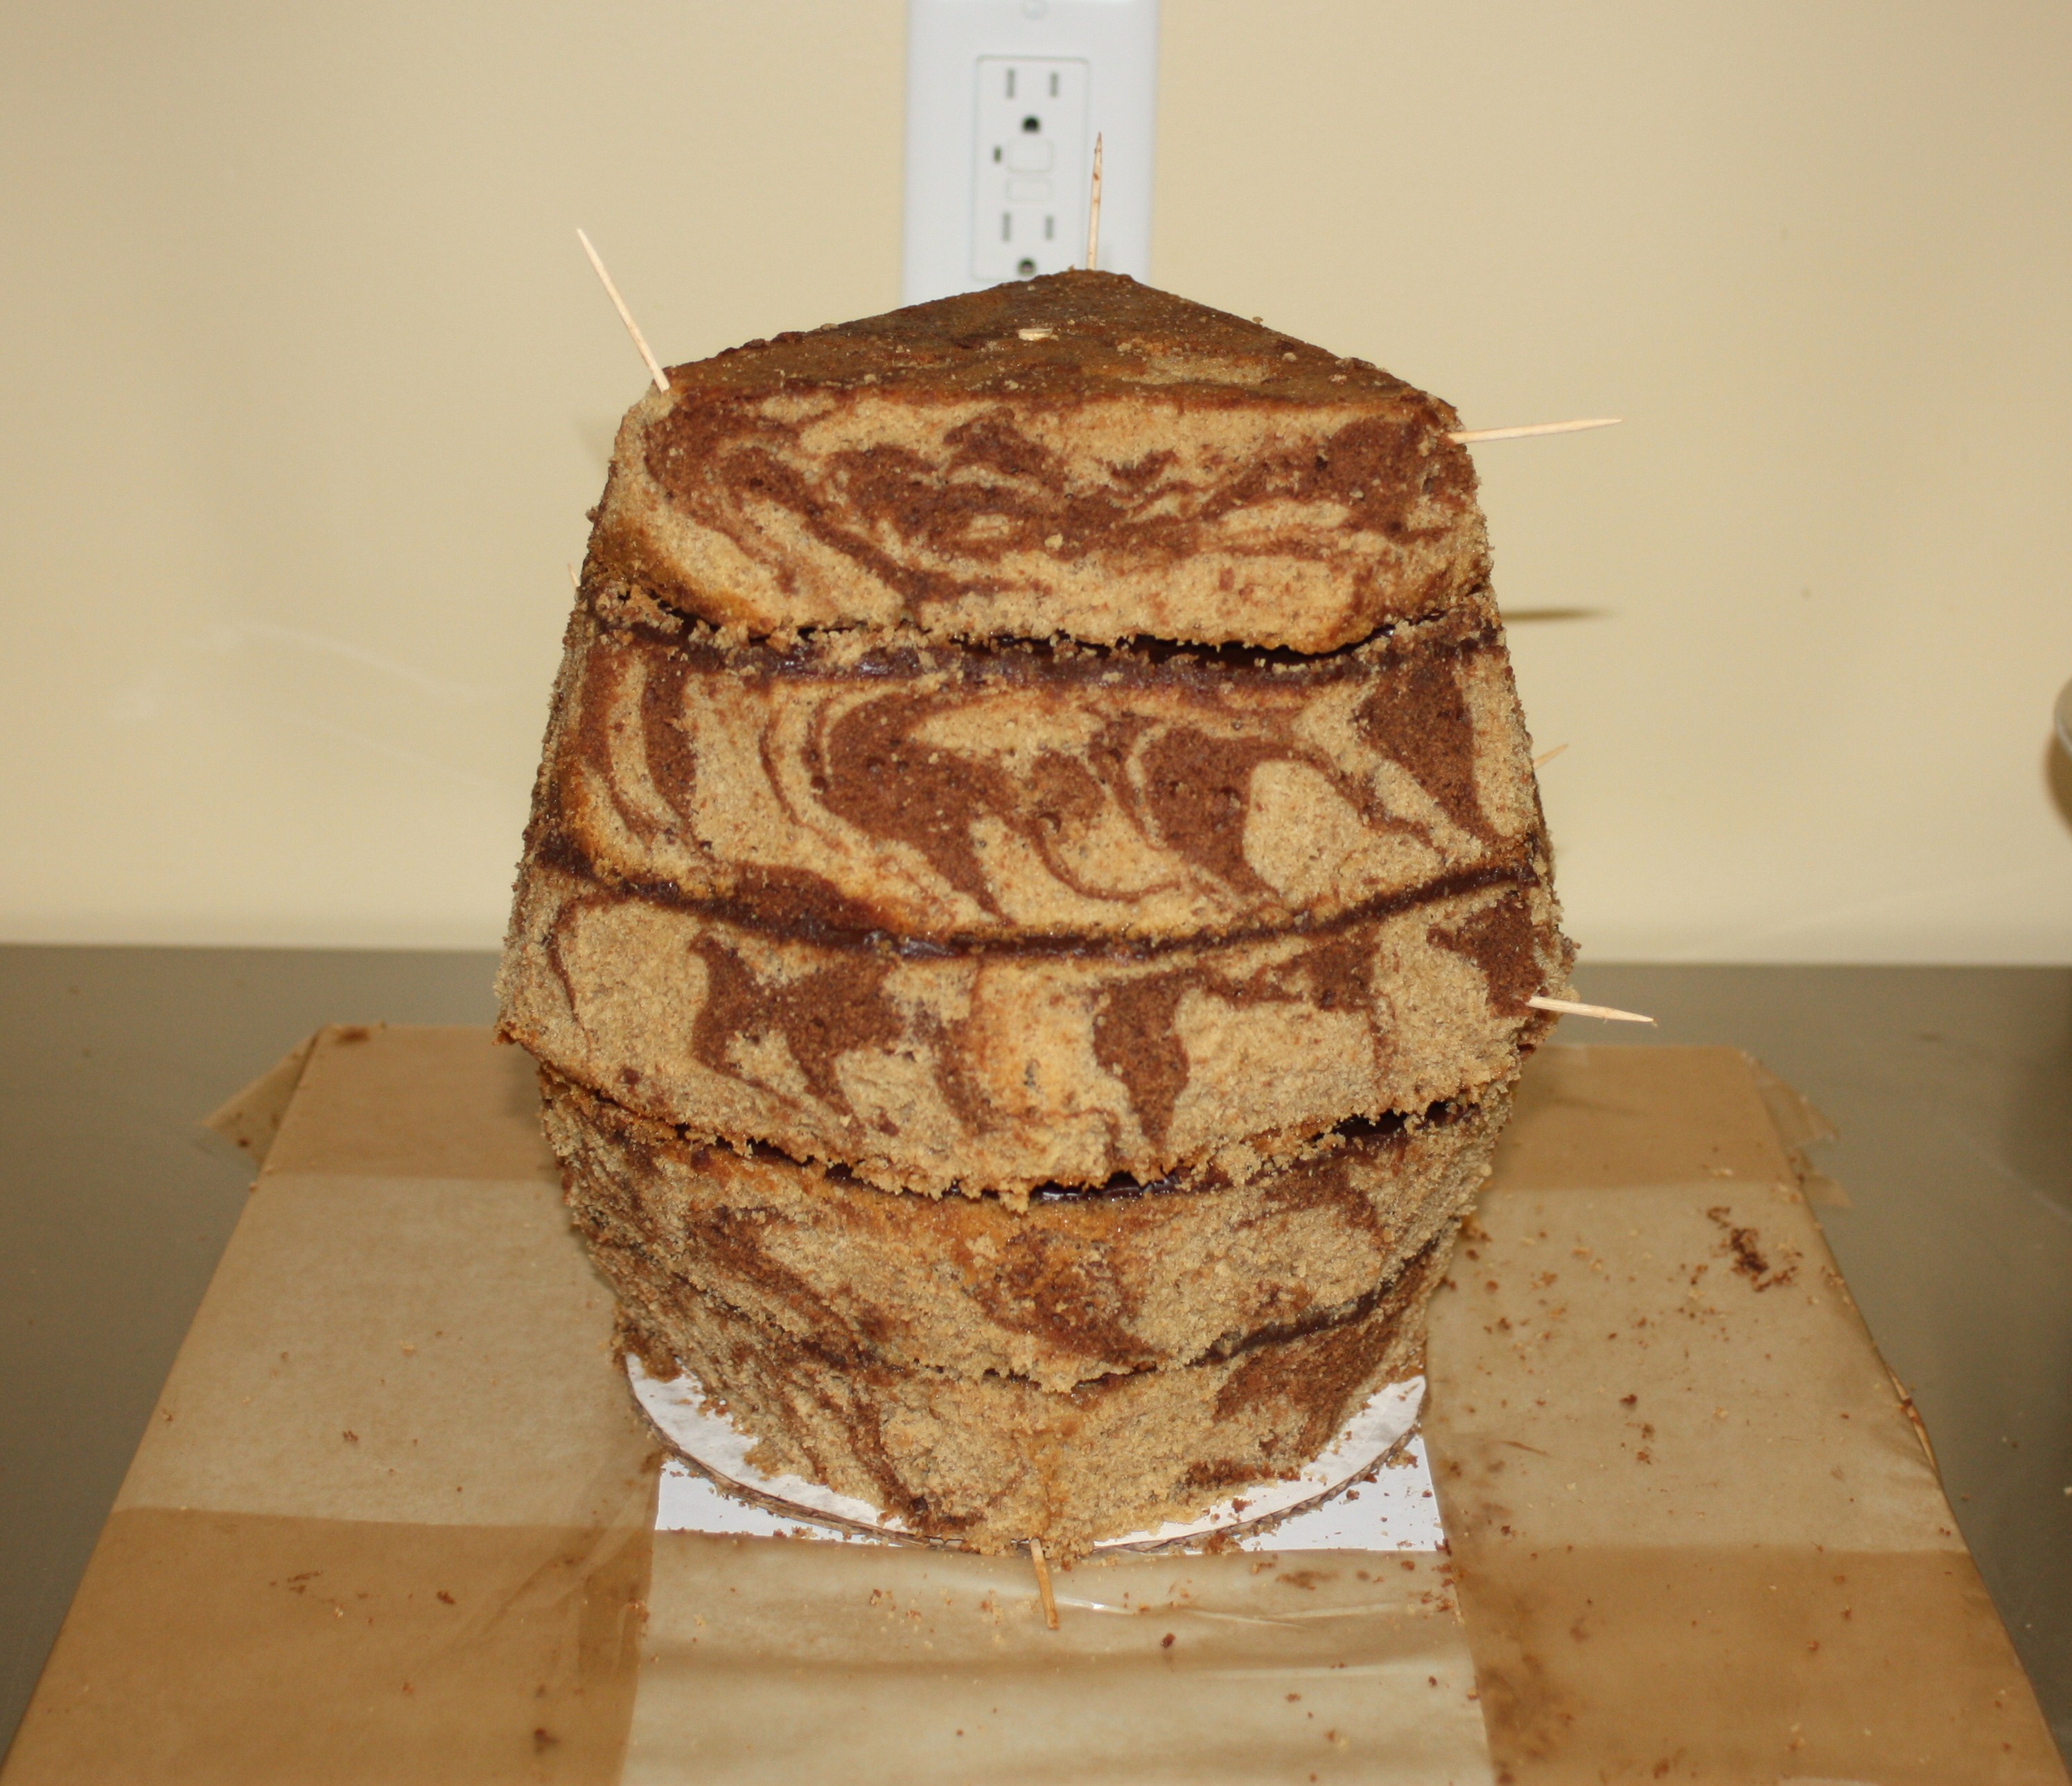
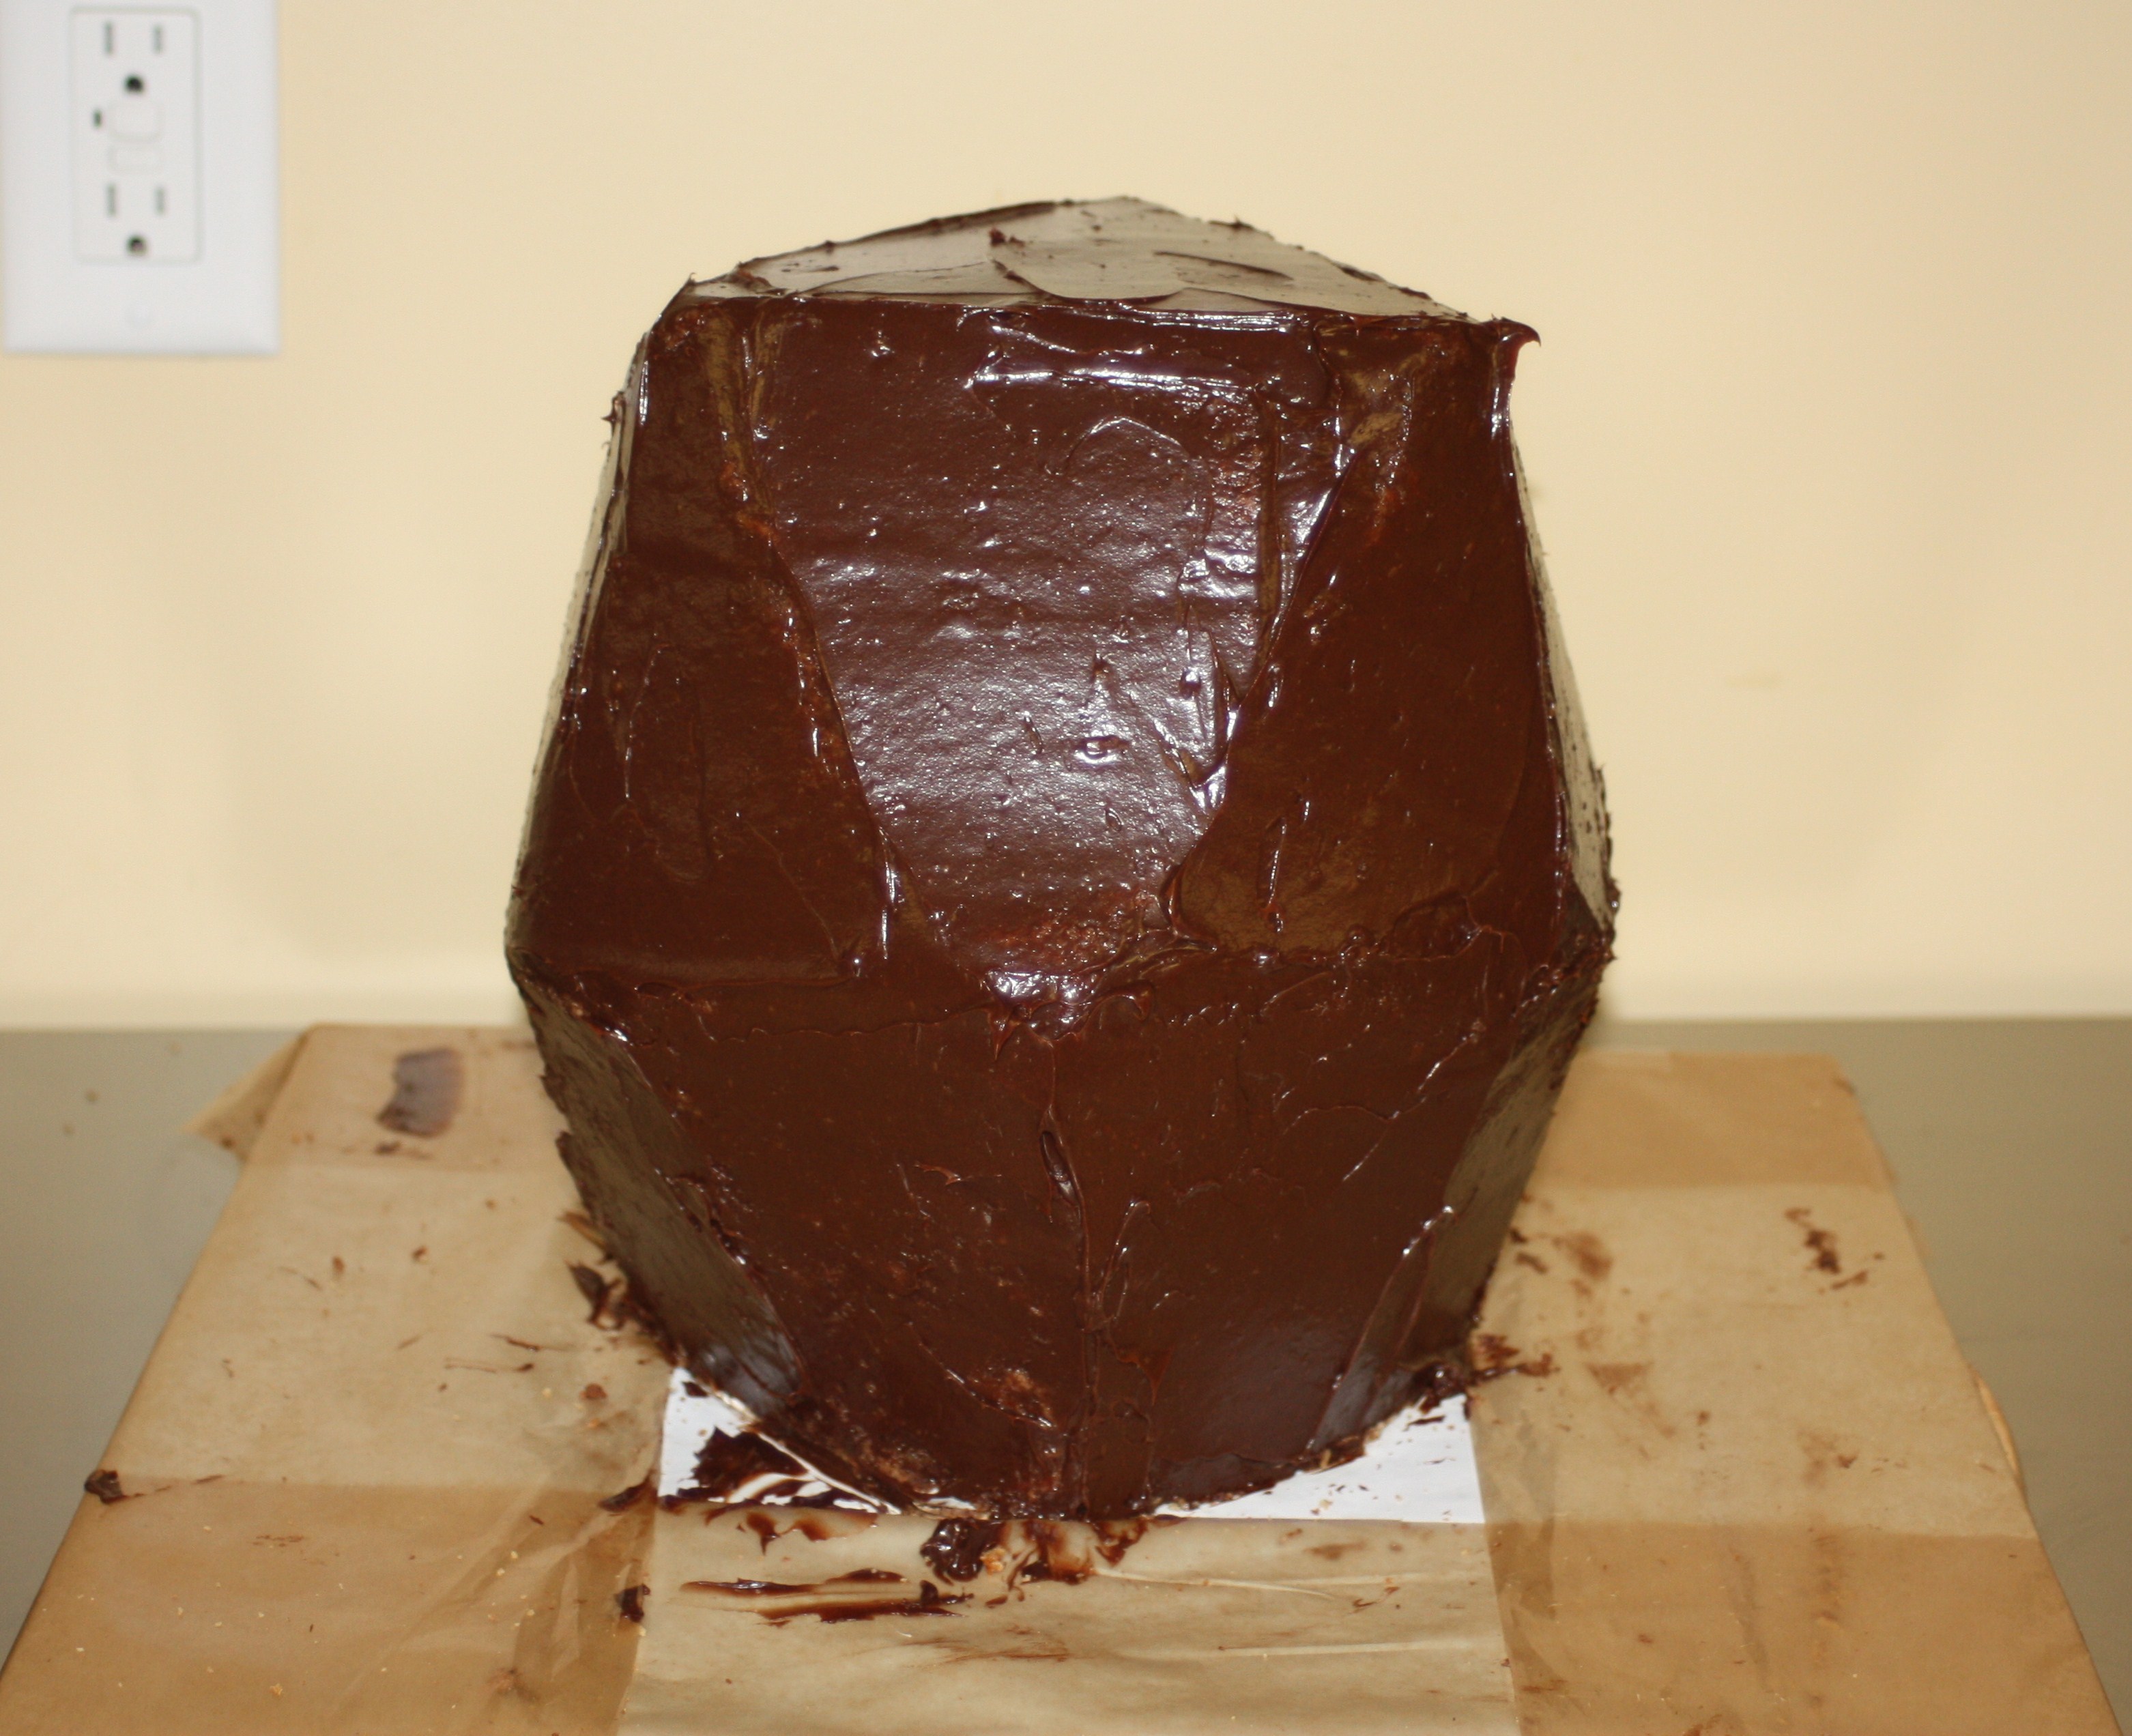
Once I hand carved all 20 faces of the die I frosted it in chocolate ganache.
Covering the cake in fondant proved to be difficult. I rolled out a very large piece of black fondant and did my best to smooth it out over the entire cake. The bottom was the most difficult part to keep smooth without wrinkling.
When the cake is covered in fondant alone it’s hard to see the definition of the sides. I cut out large numbers in white fondant to apply to each side. You can use large number cutters if you have them, but I didn’t so I printed them out using a large font in Microsoft Word, cut them out as templates and then used the templates to cut out white fondant numbers. I made sure to put them in the same order as show on the real 20-sided die.
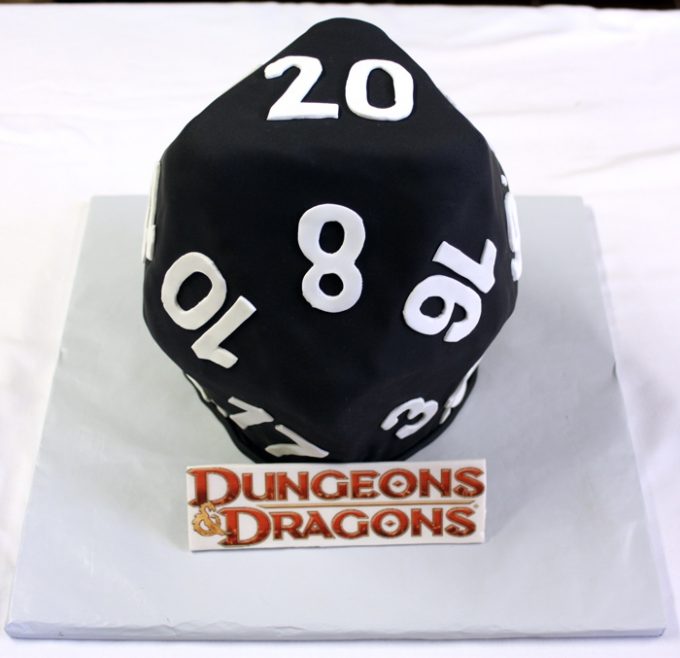
The finishing touch was a Dungeons & Dragons logo printed on an edible image printer and placed on a fondant plaque.


Leave a Reply
You must be logged in to post a comment.